Nextcloud SSO with Keycloak using OIDC
Run Nextcloud in Docker Compose behind an nginx TLS proxy and connect it to Keycloak SSO using the Social Login app. Covers full stack setup, Keycloak client config, manual endpoint configuration, attribute mapping, and exclusive SSO enforcement.
KeycloakPro Team
KeycloakPro Team
Introduction
Nextcloud supports Keycloak SSO through the Social Login app (sociallogin), which provides a "Custom OpenID Connect" provider type alongside its built-in social providers (Google, GitHub, etc).
This guide covers a self-hosted Nextcloud running in Docker Compose, behind an nginx TLS reverse proxy, connected to Keycloak 24+. Both must run on HTTPS — Keycloak refuses HTTP redirect URIs, and a secure context is required for the login flow to work correctly.
Unlike some OIDC integrations, Social Login has no discovery-URL field — you configure each Keycloak endpoint (authorize, token, userinfo, logout) individually through the Administration UI. There's no occ CLI command for provider creation with this app, so all provider configuration happens in the UI.
Prerequisites
- Keycloak 24+ with HTTPS
- Docker and Docker Compose
- A domain pointed at your host (e.g.
dev.nextcloud.io) with valid TLS certs — for local development, see "Local development HTTPS" below for a self-signed CA setup openssl(only needed for the local CA path)sudoaccess (only needed to edit/etc/hostsand trust the local CA)- Keycloak admin access
Local development HTTPS (optional)
If dev.nextcloud.io isn't a real public domain — just a name you're using on your own machine — you need three things before docker compose up -d will give you a working HTTPS site: a /etc/hosts entry pointing the domain at 127.0.0.1, a locally-trusted TLS certificate for it, and nginx config to serve that cert. The scripts below handle the first two; nginx config for ./nginx/conf.d is up to your reverse-proxy setup.
Add these as scripts/add-host.sh, scripts/generate-certs.sh, and scripts/setup.sh in your project directory:
scripts/add-host.sh — adds an idempotent, clearly-marked /etc/hosts entry:
#!/usr/bin/env bash
set -euo pipefail

DOMAIN="dev.nextcloud.io"
IP="127.0.0.1"
MARKER="# nextcloud-sso-setup"
HOSTS_FILE="/etc/hosts"
ENTRY="${IP} ${DOMAIN} ${MARKER}"

if grep -qE "^[^#]*[[:space:]]dev\.nextcloud\.io([[:space:]]|\$)" "${HOSTS_FILE}"; then
  echo "✔ ${DOMAIN} already present in ${HOSTS_FILE} — nothing to do."
  exit 0
fi

echo "▶ Adding '${ENTRY}' to ${HOSTS_FILE} (requires sudo)..."
echo "${ENTRY}" | sudo tee -a "${HOSTS_FILE}" > /dev/null
echo "✔ Added host entry."
scripts/generate-certs.sh — generates a local CA and a SAN-compliant server certificate signed by it (SAN is mandatory; browsers reject certs without it):
#!/usr/bin/env bash
set -euo pipefail

DOMAIN="dev.nextcloud.io"
SCRIPT_DIR="$(cd "$(dirname "${BASH_SOURCE[0]}")" && pwd)"
CERT_DIR="$(cd "${SCRIPT_DIR}/.." && pwd)/certs"

CA_KEY="${CERT_DIR}/ca.key"
CA_CRT="${CERT_DIR}/ca.crt"
SRV_KEY="${CERT_DIR}/${DOMAIN}.key"
SRV_CSR="${CERT_DIR}/${DOMAIN}.csr"
SRV_CRT="${CERT_DIR}/${DOMAIN}.crt"

LEAF_DAYS=825   # browser-enforced maximum
CA_DAYS=3650

FORCE="${1:-}"
mkdir -p "${CERT_DIR}"

if [[ -f "${SRV_CRT}" && "${FORCE}" != "--force" ]]; then
  echo "✔ Certificate already exists: ${SRV_CRT}"
  echo "  Run '$(basename "$0") --force' to regenerate."
  exit 0
fi

if [[ ! -f "${CA_KEY}" || "${FORCE}" == "--force" ]]; then
  openssl genrsa -out "${CA_KEY}" 4096
  openssl req -x509 -new -nodes -sha256 -days "${CA_DAYS}" \
    -key "${CA_KEY}" -out "${CA_CRT}" \
    -subj "/C=US/O=Local Dev/CN=Local Dev CA"
fi

openssl genrsa -out "${SRV_KEY}" 2048

EXT_FILE="$(mktemp)"
trap 'rm -f "${EXT_FILE}"' EXIT
cat > "${EXT_FILE}" <<EOF
basicConstraints = CA:FALSE
keyUsage         = digitalSignature, keyEncipherment
extendedKeyUsage = serverAuth
subjectAltName   = DNS:${DOMAIN}
EOF

openssl req -new -key "${SRV_KEY}" -out "${SRV_CSR}" \
  -subj "/C=US/O=Local Dev/CN=${DOMAIN}"

openssl x509 -req -in "${SRV_CSR}" \
  -CA "${CA_CRT}" -CAkey "${CA_KEY}" -CAcreateserial \
  -out "${SRV_CRT}" -days "${LEAF_DAYS}" -sha256 \
  -extfile "${EXT_FILE}"

rm -f "${SRV_CSR}"
chmod 600 "${SRV_KEY}" "${CA_KEY}"
chmod 644 "${SRV_CRT}" "${CA_CRT}"

echo "✔ Certificates written to ${CERT_DIR}/"
scripts/setup.sh — orchestrates .env creation, certs, hosts entry, and docker compose up -d in one shot:
#!/usr/bin/env bash
set -euo pipefail

SCRIPT_DIR="$(cd "$(dirname "${BASH_SOURCE[0]}")" && pwd)"
ROOT_DIR="$(cd "${SCRIPT_DIR}/.." && pwd)"

command -v openssl >/dev/null 2>&1 || { echo "✖ openssl is required."; exit 1; }
command -v docker  >/dev/null 2>&1 || { echo "✖ docker is required.";  exit 1; }

if [[ ! -f "${ROOT_DIR}/.env" ]]; then
  echo "▶ Creating .env from .env.example — EDIT THE PASSWORDS."
  cp "${ROOT_DIR}/.env.example" "${ROOT_DIR}/.env"
fi

bash "${SCRIPT_DIR}/generate-certs.sh"
bash "${SCRIPT_DIR}/add-host.sh"

( cd "${ROOT_DIR}" && docker compose up -d )

echo "✔ Done. Open https://dev.nextcloud.io"
echo "  (trust certs/ca.crt first to avoid browser warnings)"
Make them executable and run the orchestrator:
chmod +x scripts/*.sh
./scripts/setup.sh
Then trust the local CA so your browser stops warning about it:
# macOS
sudo security add-trusted-cert -d -r trustRoot \
  -k /Library/Keychains/System.keychain certs/ca.crt
Linux equivalent: copy
certs/ca.crtinto/usr/local/share/ca-certificates/, then runsudo update-ca-certificates. For browser-specific trust (Firefox, Chrome on Linux), import it via the browser's certificate settings instead, since the system store isn't always read by browsers there.
To remove this local setup later:
docker compose down -v
sudo sed -i '' '/nextcloud-sso-setup/d' /etc/hosts   # macOS; on Linux, drop the '' after -i
rm -rf certs/
Step 0 — Stand up the Nextcloud stack
Before any OIDC config, get Nextcloud itself running.
Create a project directory and cd into it — this is where docker-compose.yml, .env, and any supporting folders (certs/, nginx/conf.d/) will live:
mkdir nextcloud-sso-setup
cd nextcloud-sso-setup
A minimal production-leaning stack looks like this. Save it as docker-compose.yml in that directory:
# docker-compose.yml
services:
  db:
    image: mariadb:11.4
    container_name: nextcloud-db
    restart: unless-stopped
    command: >
      --transaction-isolation=READ-COMMITTED
      --log-bin=binlog
      --binlog-format=ROW
    environment:
      MYSQL_ROOT_PASSWORD: ${MYSQL_ROOT_PASSWORD}
      MYSQL_DATABASE: ${MYSQL_DATABASE}
      MYSQL_USER: ${MYSQL_USER}
      MYSQL_PASSWORD: ${MYSQL_PASSWORD}
    volumes:
      - db_data:/var/lib/mysql
    networks:
      - nextcloud
    healthcheck:
      test: ["CMD", "healthcheck.sh", "--connect", "--innodb_initialized"]
      interval: 10s
      timeout: 5s
      retries: 10

  redis:
    image: redis:7-alpine
    container_name: nextcloud-redis
    restart: unless-stopped
    networks:
      - nextcloud

  nextcloud:
    image: nextcloud:31-apache
    container_name: nextcloud-app
    restart: unless-stopped
    depends_on:
      db:
        condition: service_healthy
      redis:
        condition: service_started
    environment:
      MYSQL_HOST: db
      MYSQL_DATABASE: ${MYSQL_DATABASE}
      MYSQL_USER: ${MYSQL_USER}
      MYSQL_PASSWORD: ${MYSQL_PASSWORD}
      REDIS_HOST: redis
      NEXTCLOUD_ADMIN_USER: ${NEXTCLOUD_ADMIN_USER}
      NEXTCLOUD_ADMIN_PASSWORD: ${NEXTCLOUD_ADMIN_PASSWORD}
      OVERWRITEPROTOCOL: https
      OVERWRITECLIURL: https://${NEXTCLOUD_DOMAIN}
      TRUSTED_PROXIES: ${TRUSTED_PROXIES}
    volumes:
      - nextcloud_data:/var/www/html
    networks:
      - nextcloud

  # Background jobs every 5 min via the image's built-in cron loop
  cron:
    image: nextcloud:31-apache
    container_name: nextcloud-cron
    restart: unless-stopped
    entrypoint: /cron.sh
    volumes:
      - nextcloud_data:/var/www/html
    depends_on:
      db:
        condition: service_healthy
      redis:
        condition: service_started
    networks:
      - nextcloud

  nginx:
    image: nginx:alpine
    container_name: nextcloud-nginx
    restart: unless-stopped
    depends_on:
      - nextcloud
    ports:
      - "80:80"
      - "443:443"
    volumes:
      - ./nginx/conf.d:/etc/nginx/conf.d:ro
      - ./certs:/etc/nginx/certs:ro
    networks:
      - nextcloud

volumes:
  db_data:
  nextcloud_data:

networks:
  nextcloud:
    driver: bridge
    ipam:
      config:
        - subnet: 172.28.0.0/16
Create a .env.example alongside it so anyone cloning the setup knows exactly what to fill in:
# .env.example
# Copy to .env and change every value before starting the stack.

# --- MariaDB ---
MYSQL_ROOT_PASSWORD=change-me-root-password
MYSQL_DATABASE=nextcloud
MYSQL_USER=nextcloud
MYSQL_PASSWORD=change-me-nextcloud-password

# --- Nextcloud admin (created on first boot) ---
NEXTCLOUD_ADMIN_USER=admin
NEXTCLOUD_ADMIN_PASSWORD=change-me-admin-password

# --- Domain / proxy ---
NEXTCLOUD_DOMAIN=your-domain.example.com
# Docker network subnet — must match docker-compose.yml; used as Nextcloud TRUSTED_PROXIES
TRUSTED_PROXIES=172.28.0.0/16
From inside the project directory:
cp .env.example .env
docker compose up -d
Then edit .env with real values before (or right after) bringing the stack up — Compose reads .env automatically since it sits next to docker-compose.yml.
Key points specific to this setup:
OVERWRITEPROTOCOL: httpsandOVERWRITECLIURLare required — without them, Nextcloud generateshttp://URLs internally even though nginx terminates TLS, which breaks the OIDC redirect URI matching in Step 2.TRUSTED_PROXIESmust include the nginx container's network range (or service name resolution) so Nextcloud trusts the forwarded headers from the reverse proxy.- The
cronservice shares the same app volume asnextcloudand runs Nextcloud's background jobs — this matters later for token housekeeping and provisioning sync, not just for OIDC, but it's easy to skip when focused on auth.
Step 1 — Install the Social Login app
Install Nextcloud's Social Login app, which supports custom OpenID Connect providers (including Keycloak) alongside the usual social logins:
docker compose exec --user www-data nextcloud php occ app:install sociallogin
Equivalent UI path: top-right menu → Apps → search for Social Login → Install.
Once installed, it appears under Administration settings → Social login.
If the App Store UI fails to load apps or downloads stall partway through, this is often a Docker network MTU mismatch rather than a Nextcloud problem — see Troubleshooting below. Installing via
occ app:installinstead avoids the App Store CDN download path entirely, since it pulls the app differently — worth trying first if you've hit MTU issues.
Step 2 — Create the Keycloak confidential client
In the Keycloak admin console:
- Clients → Create client
- Client type:
OpenID Connect - Client ID:
nextcloud - Click Next
Capability config:
- Client authentication: ON (confidential client — Nextcloud stores the secret server-side)
- Standard flow: ON
- Direct access grants: OFF
- Click Next
Login settings:
- Root URL:
https://dev.nextcloud.io - Valid redirect URIs:
https://dev.nextcloud.io/apps/sociallogin/custom_oidc/keycloakpro - Valid post logout redirect URIs:
https://dev.nextcloud.io/ - Web origins:
https://dev.nextcloud.io
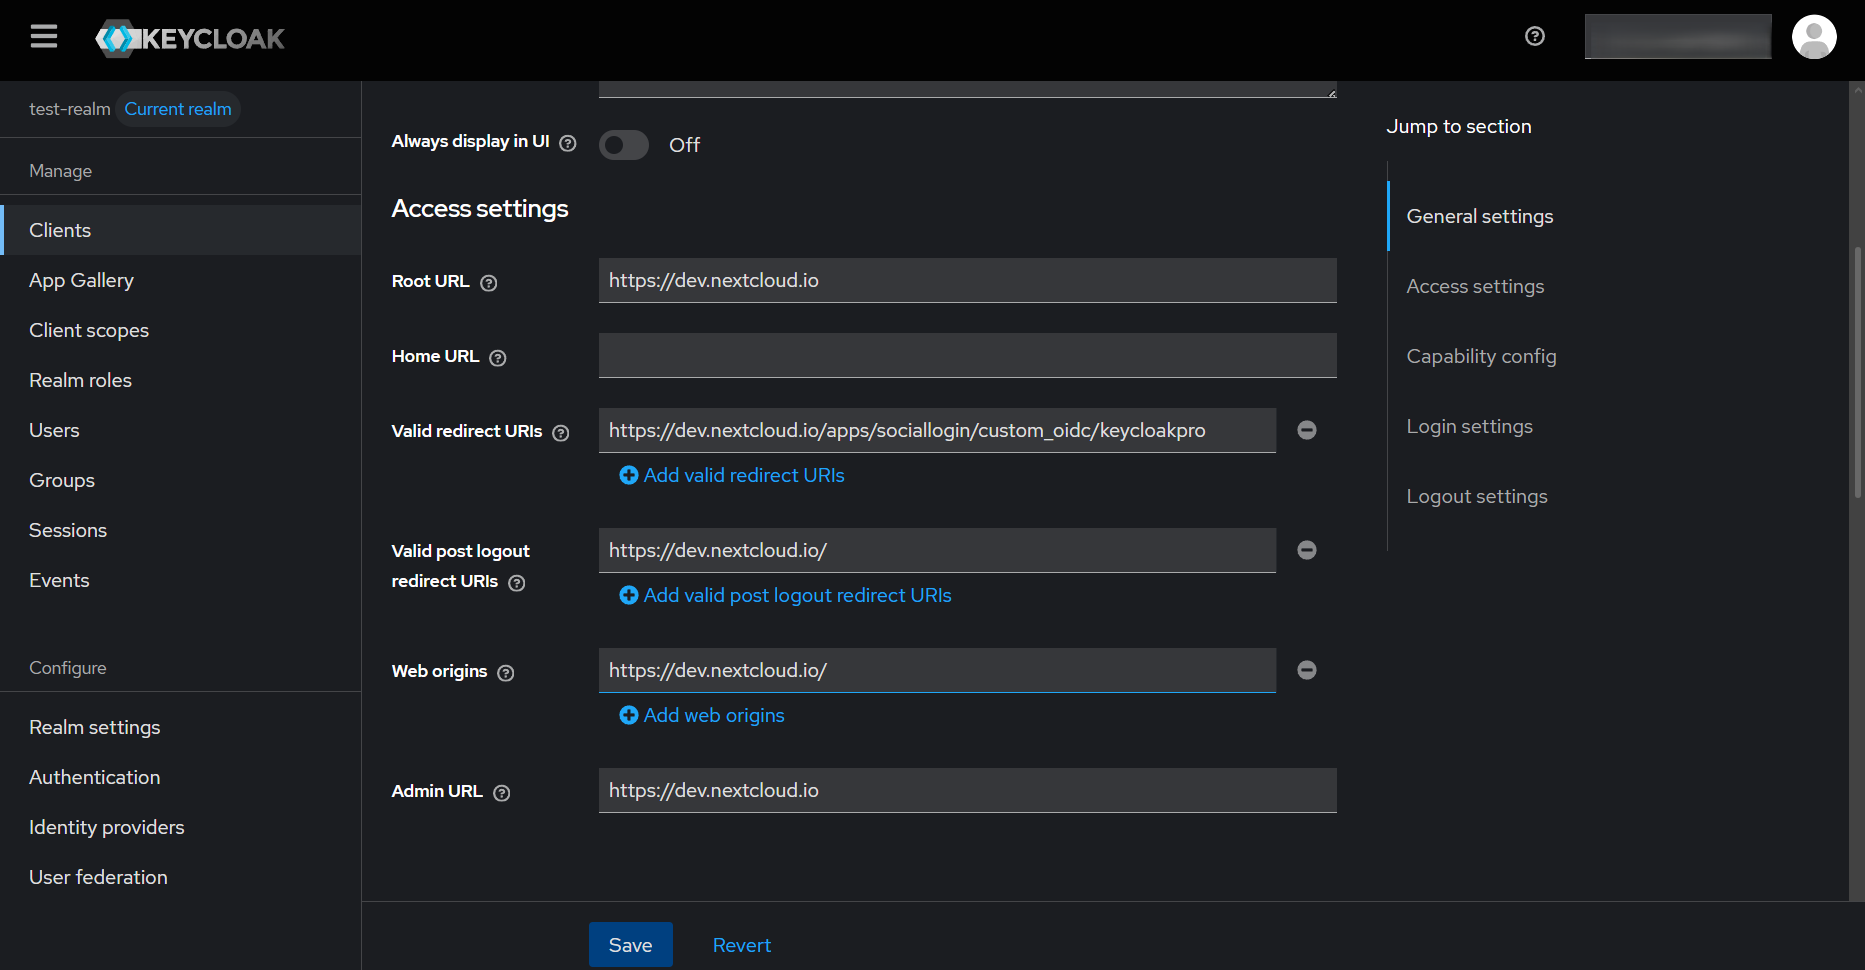
The redirect path for Social Login is
/apps/sociallogin/custom_oidc/<internal-name>, where<internal-name>matches whatever you set as the Internal name field in Step 3. This is different fromuser_oidc's fixed/apps/user_oidc/codepath — if you change the internal name later, you must update the redirect URI in Keycloak to match.
2.1 — Copy the client secret
Clients → nextcloud → Credentials → copy the client secret.

2.2 — Confirm the email mapper is present
Keycloak includes an email claim by default via the built-in email scope, but it's worth checking before you rely on it for account provisioning.
- Clients → nextcloud → Client scopes → nextcloud-dedicated → Mappers
- Confirm a mapper for
emailexists in the list
If the claim is missing, add one: Add mapper → By configuration → User Property → Property: email, Token Claim Name: email.
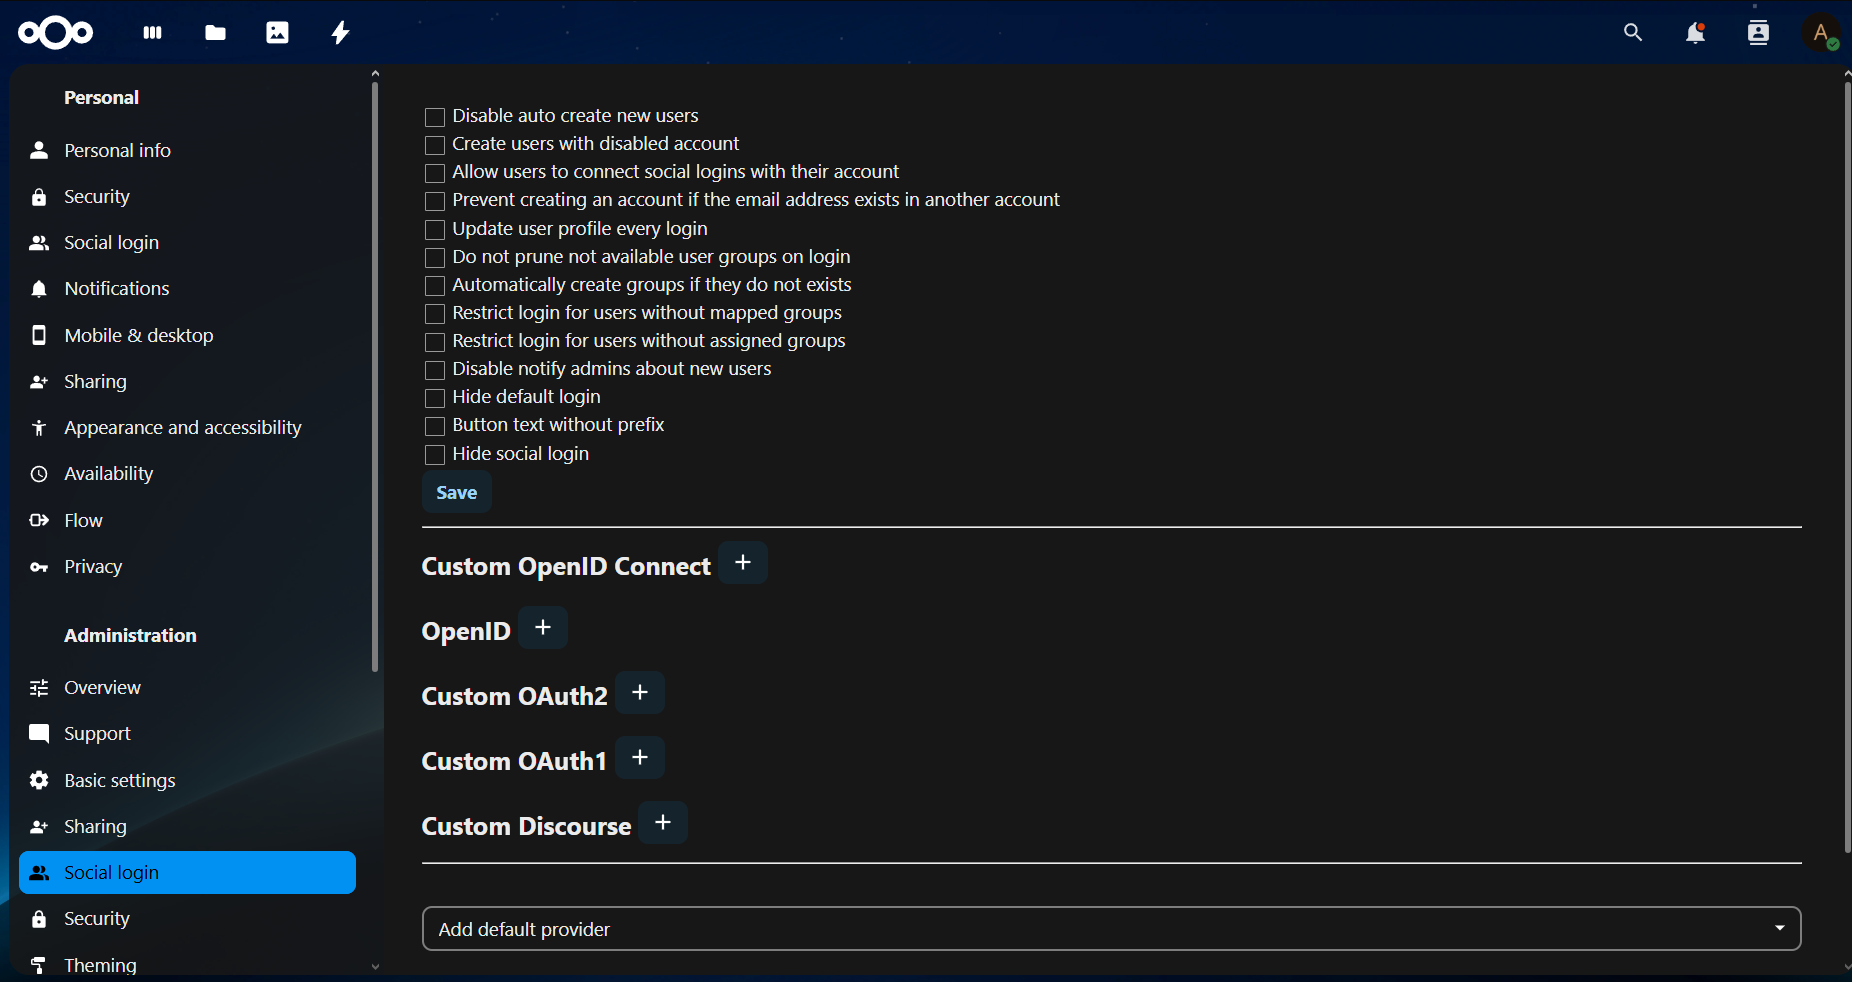
Step 3 — Configure the OIDC provider in Nextcloud (Social Login)
Unlike apps that use a single discovery URL, Social Login has no discovery-URL field — you provide each Keycloak endpoint manually. Go to Administration settings → Social login, scroll to Custom OpenID Connect, and click + to add a provider:
| Field | Value |
|---|---|
| Internal name | keycloakpro (any unique identifier, no spaces — this also becomes part of the redirect URI) |
| Title | SSO (text shown on the login button) |
| Authorize url | https://<keycloak-host>/realms/<realm>/protocol/openid-connect/auth |
| Token url | https://<keycloak-host>/realms/<realm>/protocol/openid-connect/token |
| Display name claim (optional) | name |
| User info URL (optional) | https://<keycloak-host>/realms/<realm>/protocol/openid-connect/userinfo |
| Logout URL (optional) | https://<keycloak-host>/realms/<realm>/protocol/openid-connect/logout |
| Client Id | nextcloud |
| Client Secret | (paste from Step 2.1) |
| Scope | openid email profile |
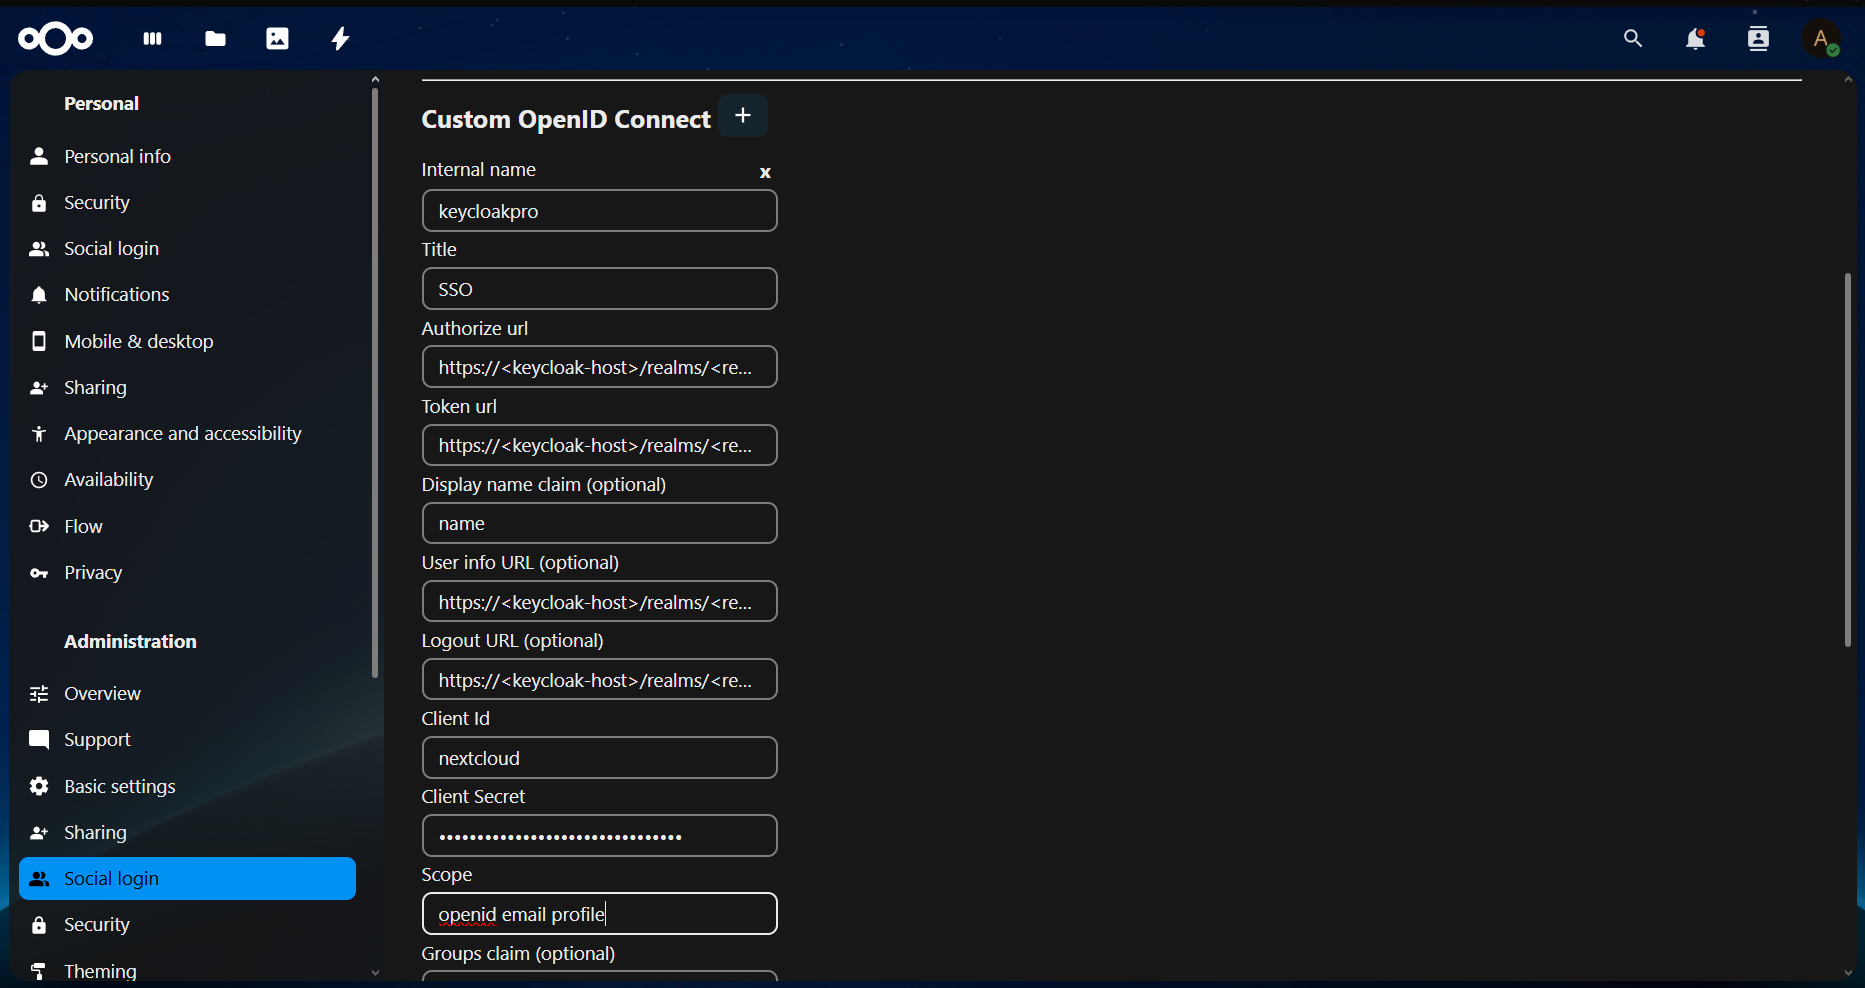
Click Save.
Where these URLs come from: every Keycloak realm exposes them at a predictable path under
/realms/<realm>/protocol/openid-connect/. You can confirm the exact values by checking your realm's discovery document directly:https://<keycloak-host>/realms/<realm>/.well-known/openid-configuration— even though Social Login doesn't consume that document automatically, it's the fastest way to copy the right endpoint values without typos.
3.1 — Attribute mapping
Social Login doesn't expose a separate "unique identifier" mapping field — it derives the Nextcloud user from the OIDC sub claim by default, which is stable and never changes even if a Keycloak username or email is later updated. The Display name claim field above only controls what's shown as the display name (commonly name or preferred_username) — it does not affect how the account is matched.
3.2 — Optional: hide the default login form
Back at the top of the Social login settings page, Hide social login controls whether the username/password form is hidden in favor of just the SSO button(s).
Leave this off until you've fully confirmed Keycloak login works end-to-end — same caution as Step 5's exclusive-SSO setting. If something is misconfigured and you've already hidden local login, you can lock yourself out of the admin panel.
Step 4 — Test the login
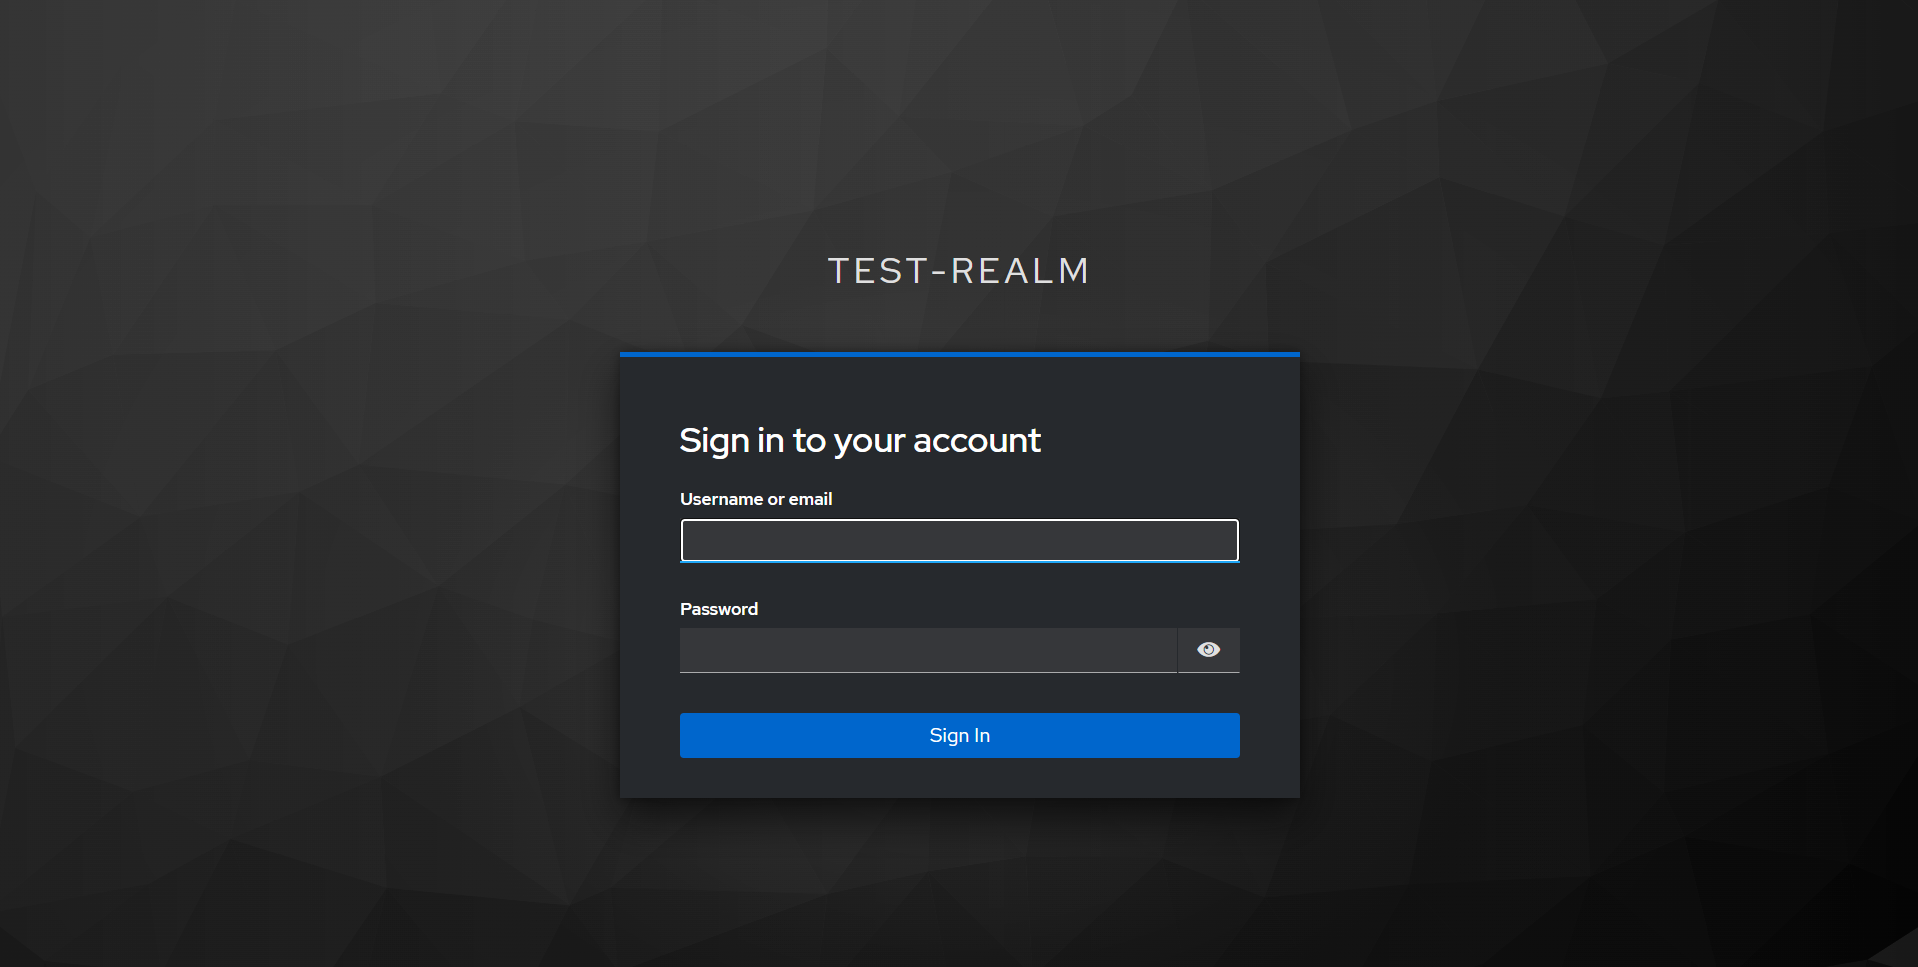
Open a private browser window and go to https://dev.nextcloud.io. A Login with SSO button (or whatever title you set in Step 3) appears on the login page.
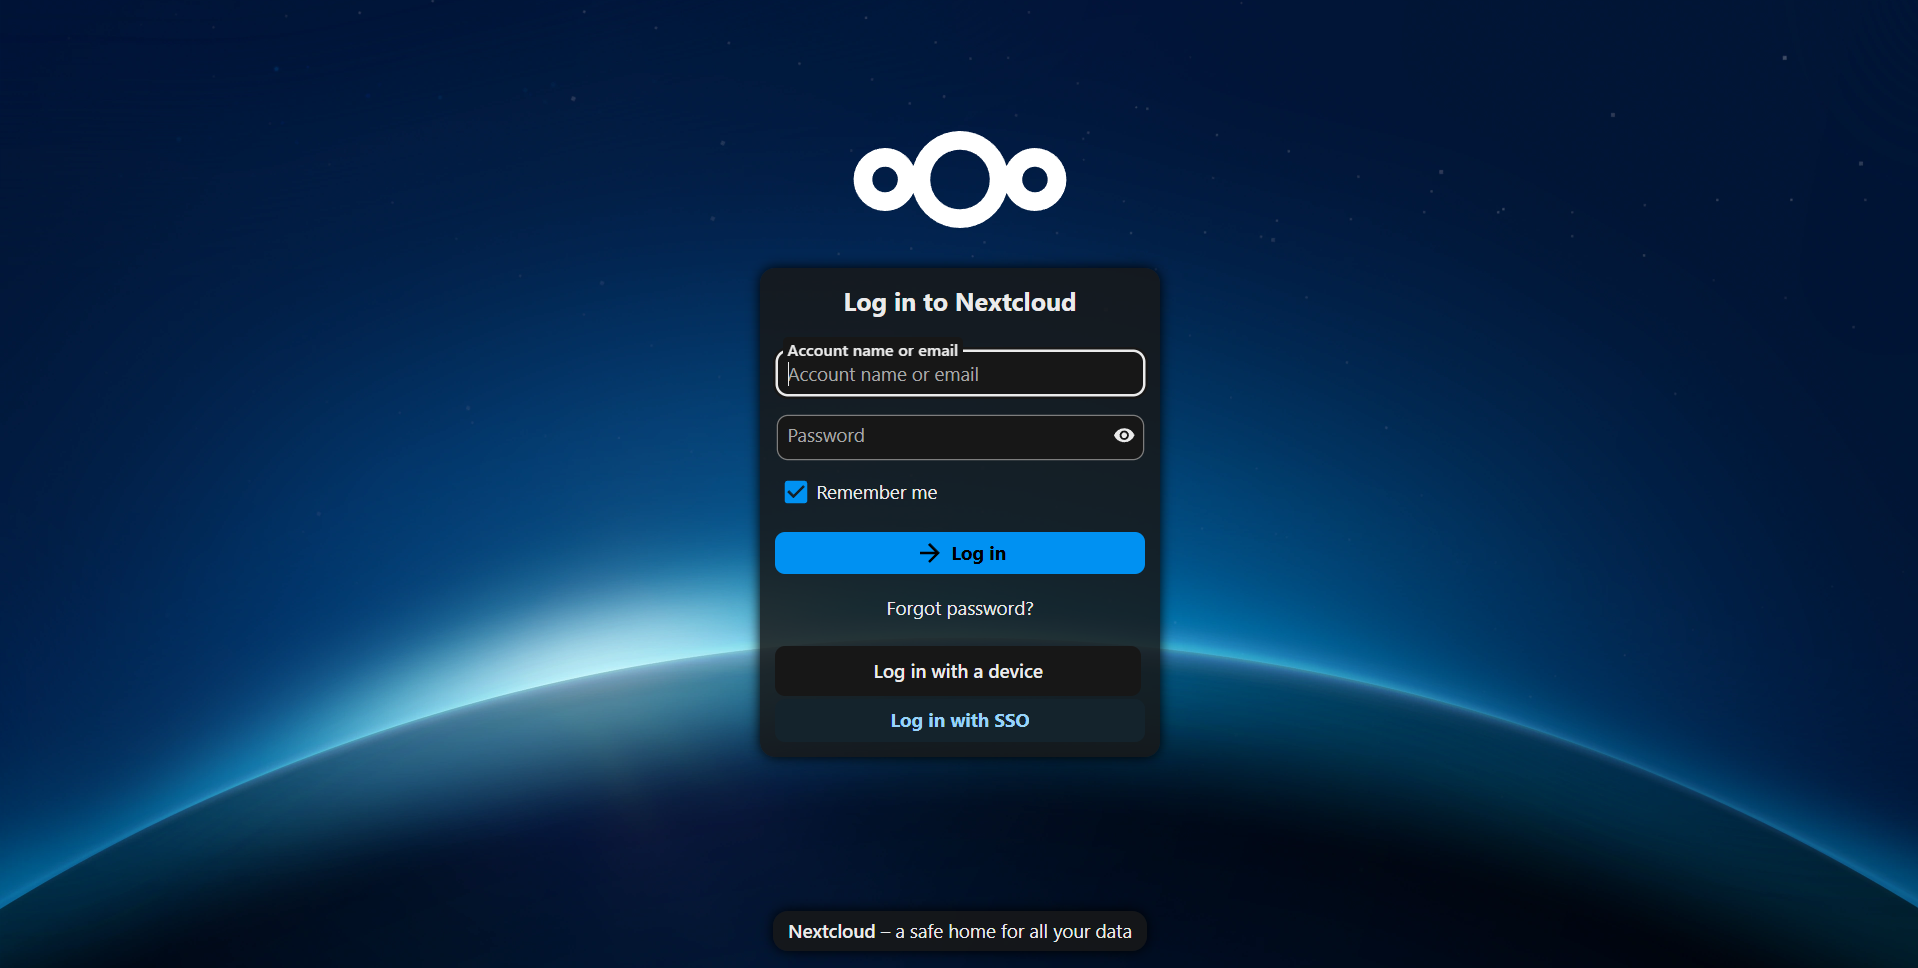
Click the button. Keycloak handles authentication:
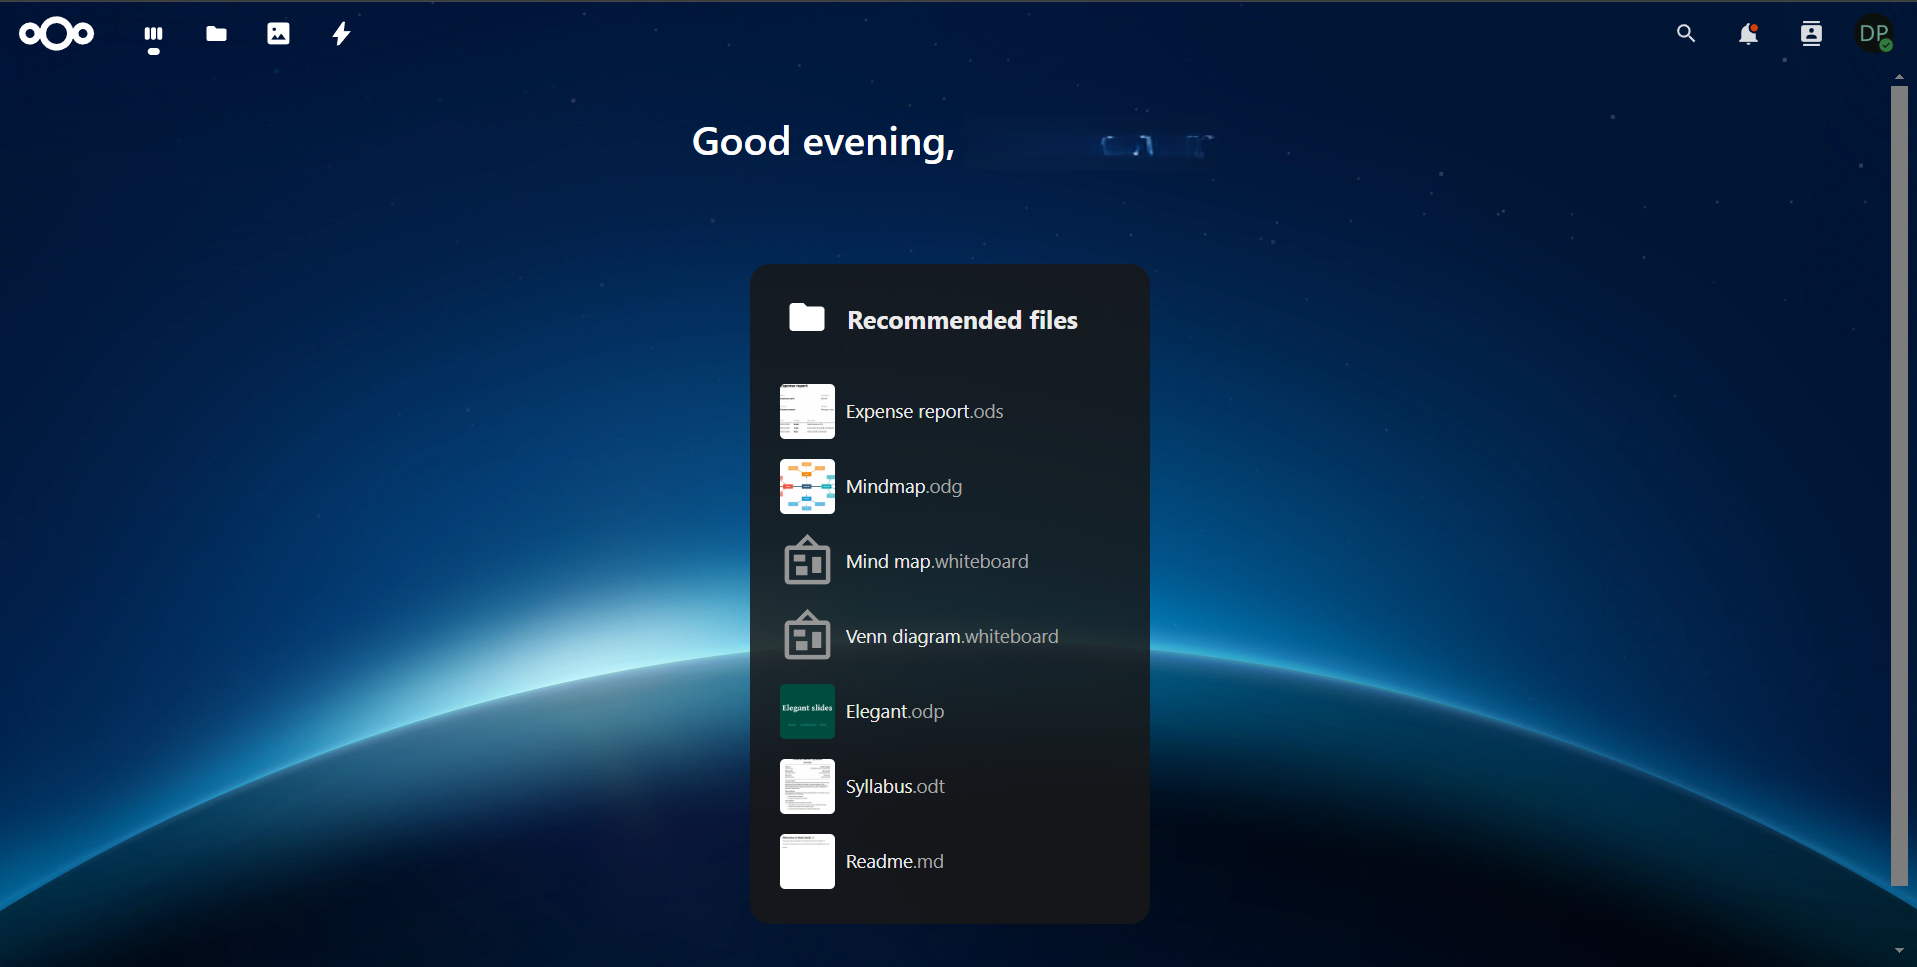
After login, Nextcloud provisions the account from the Keycloak token claims and shows the home dashboard:
Step 5 — Disable local login (optional)
Once SSO is working, you can hide the username/password form so Keycloak is the only visible login path. In Administration settings → Social login, check Hide social login... actually this checkbox is misleadingly named — it hides the native login form section, not the social providers. To confirm the exact behavior for your Nextcloud version before relying on it in production, test in a private window after toggling it.
For a harder enforcement (blocking local password auth entirely, not just hiding the UI), use:
docker compose exec --user www-data nextcloud php occ config:app:set sociallogin disable_password_confirmation --value=1
Test any local-login restriction thoroughly in a staging environment before applying to production, and keep a Keycloak admin account that can recover access to the Nextcloud admin panel. Locking out local login without a tested recovery path is the most common way to get stuck out of your own instance.
Troubleshooting common issues
"Invalid redirect URI" from Keycloak
The redirect URI Nextcloud sends must match the Valid redirect URIs field exactly. For Social Login, the path is /apps/sociallogin/custom_oidc/<internal-name> — the <internal-name> must exactly match what you entered in Step 3's Internal name field, including case. Check Keycloak's error page for the URI that was actually sent, then match it.
Login button missing after saving the provider
The sociallogin app may not be enabled, or the provider form didn't save correctly. Confirm via docker compose exec --user www-data nextcloud php occ app:list | grep sociallogin, or check Administration → Apps. Also double check you clicked Save after filling in the Custom OpenID Connect fields — the form does not autosave.
Account provisioning succeeds but the user cannot log in
This is uncommon with Social Login since it relies on the stable sub claim by default. If it happens, check that the Authorize url, Token url, and Client Id all still match what's configured in Keycloak — a realm rename or client ID change will break the link even though sub itself is stable.
Endpoint URLs are reachable from the browser but not from Nextcloud's server
Social Login's token exchange happens server-to-server, not through the browser. In a Docker setup this usually means the nextcloud container can't resolve or reach the Keycloak host — check container DNS/network config, not just firewall rules on the host.
App Store downloads stall or partially fail
If installing sociallogin (or any app) hangs or fails partway through a download, check for a Docker network MTU mismatch — common on Windows/WSL setups. Symptoms: connections to the app store CDN start fine but truncate. Fix by setting an explicit MTU on the Docker network (commonly 1400–1450) in your Compose network config or daemon settings.
Pasting multi-line CLI commands breaks them
If a multi-line occ or shell command (using \ continuations) is pasted from a Windows-side editor, CRLF line endings can break the continuation, causing each line to run as a separate, invalid command. Always run CLI setup commands as a single line where possible, or run dos2unix on any script file before executing it.
Production checklist
- HTTPS on both Nextcloud and Keycloak
-
OVERWRITEPROTOCOLandOVERWRITECLIURLset correctly when behind a reverse proxy -
TRUSTED_PROXIESincludes the proxy's network range - Redirect URI matches
/apps/sociallogin/custom_oidc/<internal-name>exactly, including the internal name - Client secret stored in Nextcloud's database, not in source control
- Confirmed the
emailmapper exists on the Keycloak client scope - Tested with a fresh Keycloak user who has no prior Nextcloud account
- Local-login restriction (if used) tested in a staging environment before production
- At least one Keycloak admin account available for Nextcloud recovery access
Need help integrating Nextcloud with Keycloak?
We deliver production-ready Nextcloud + Keycloak integrations in 1–3 weeks.
Fixed-price, zero vendor lock-in, full source code ownership.