Grafana SSO with Keycloak using OIDC
Set up Keycloak SSO in Grafana using the built-in generic OAuth provider. Covers confidential client setup, role mapping, auto-login, and single logout.
KeycloakPro Team
KeycloakPro Team
Introduction
Grafana ships with a built-in generic_oauth provider. No plugin, no extra packages. Point it at Keycloak, map roles, and every user with a Keycloak account can log into Grafana without a separate Grafana password.
This guide covers Grafana 10+ with Keycloak 24+. The ini key names are the same in Grafana 9.x, though some settings moved between minor versions — check your version's release notes for exact paths.
Prerequisites
- Keycloak 24+ with HTTPS
- Grafana 10+ (Docker, RPM, or DEB)
- Keycloak admin access
- Grafana admin access
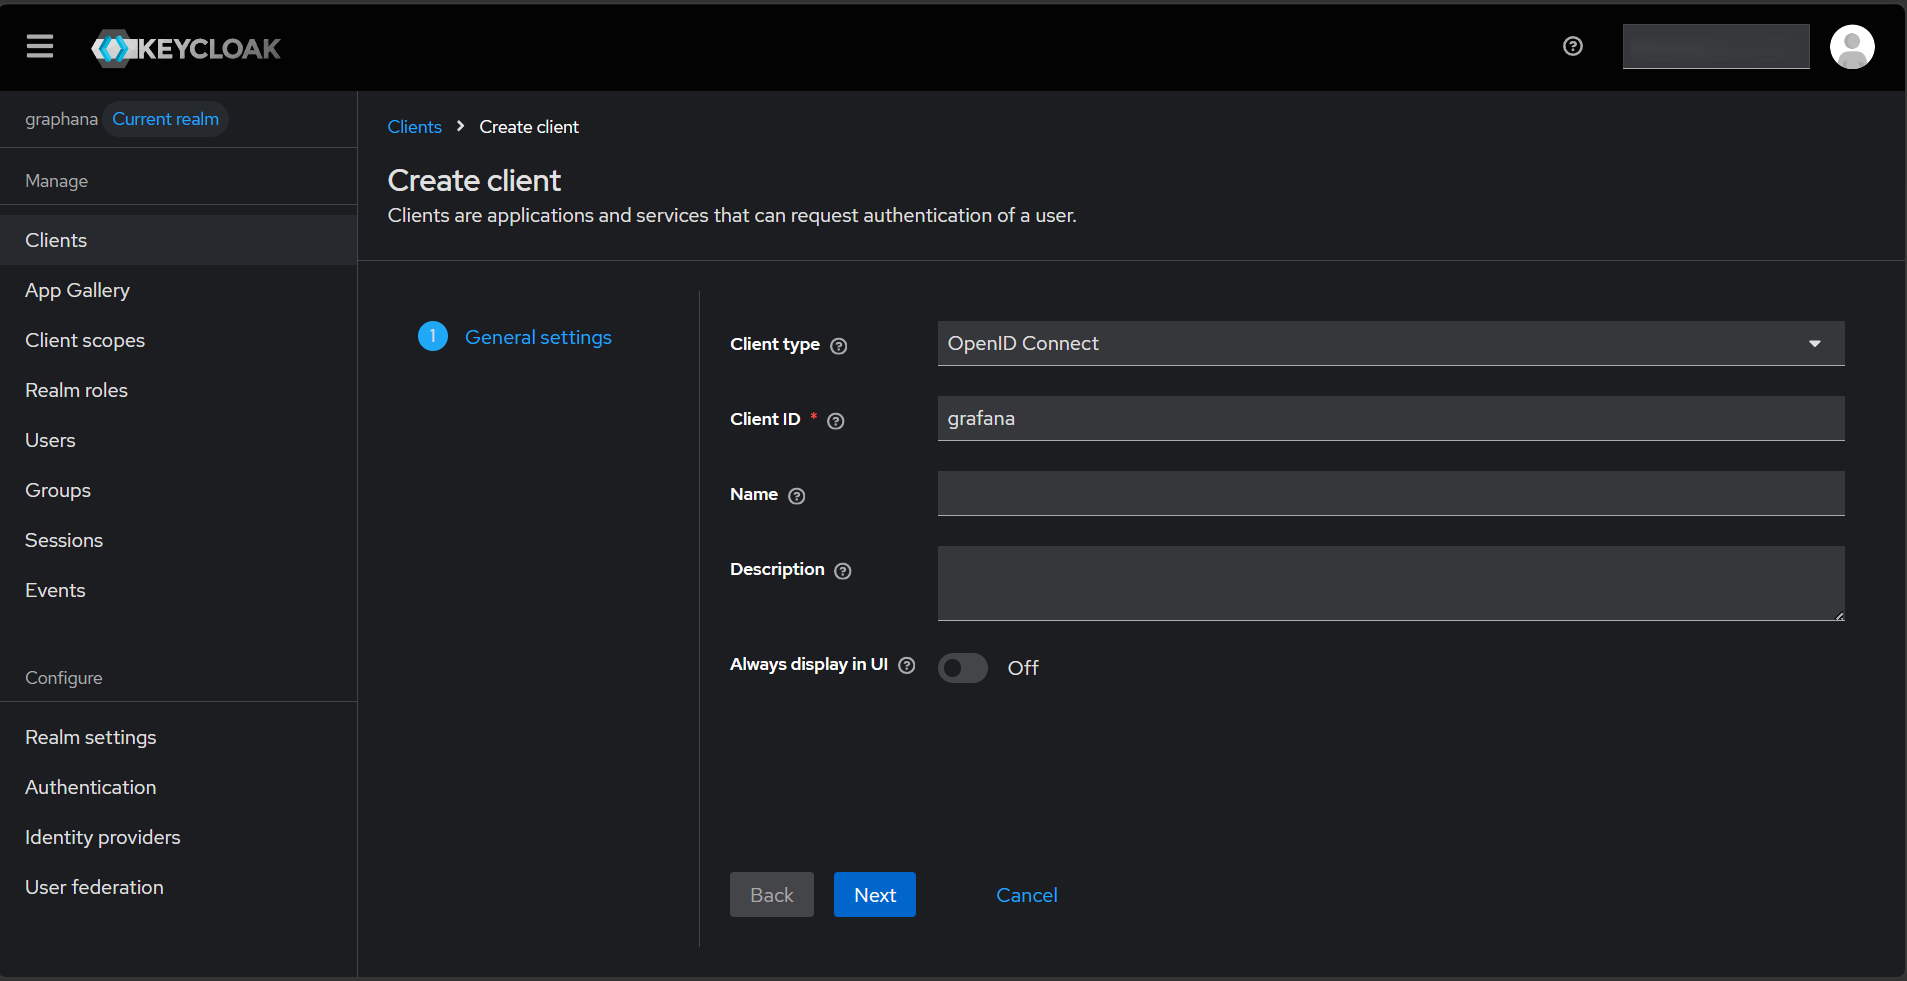
Step 1 — Create the Keycloak confidential client
Grafana runs server-side and can store a client secret, so use a confidential client.
In the Keycloak admin console:
- Clients → Create client
- Client type:
OpenID Connect - Client ID:
grafana - Click Next
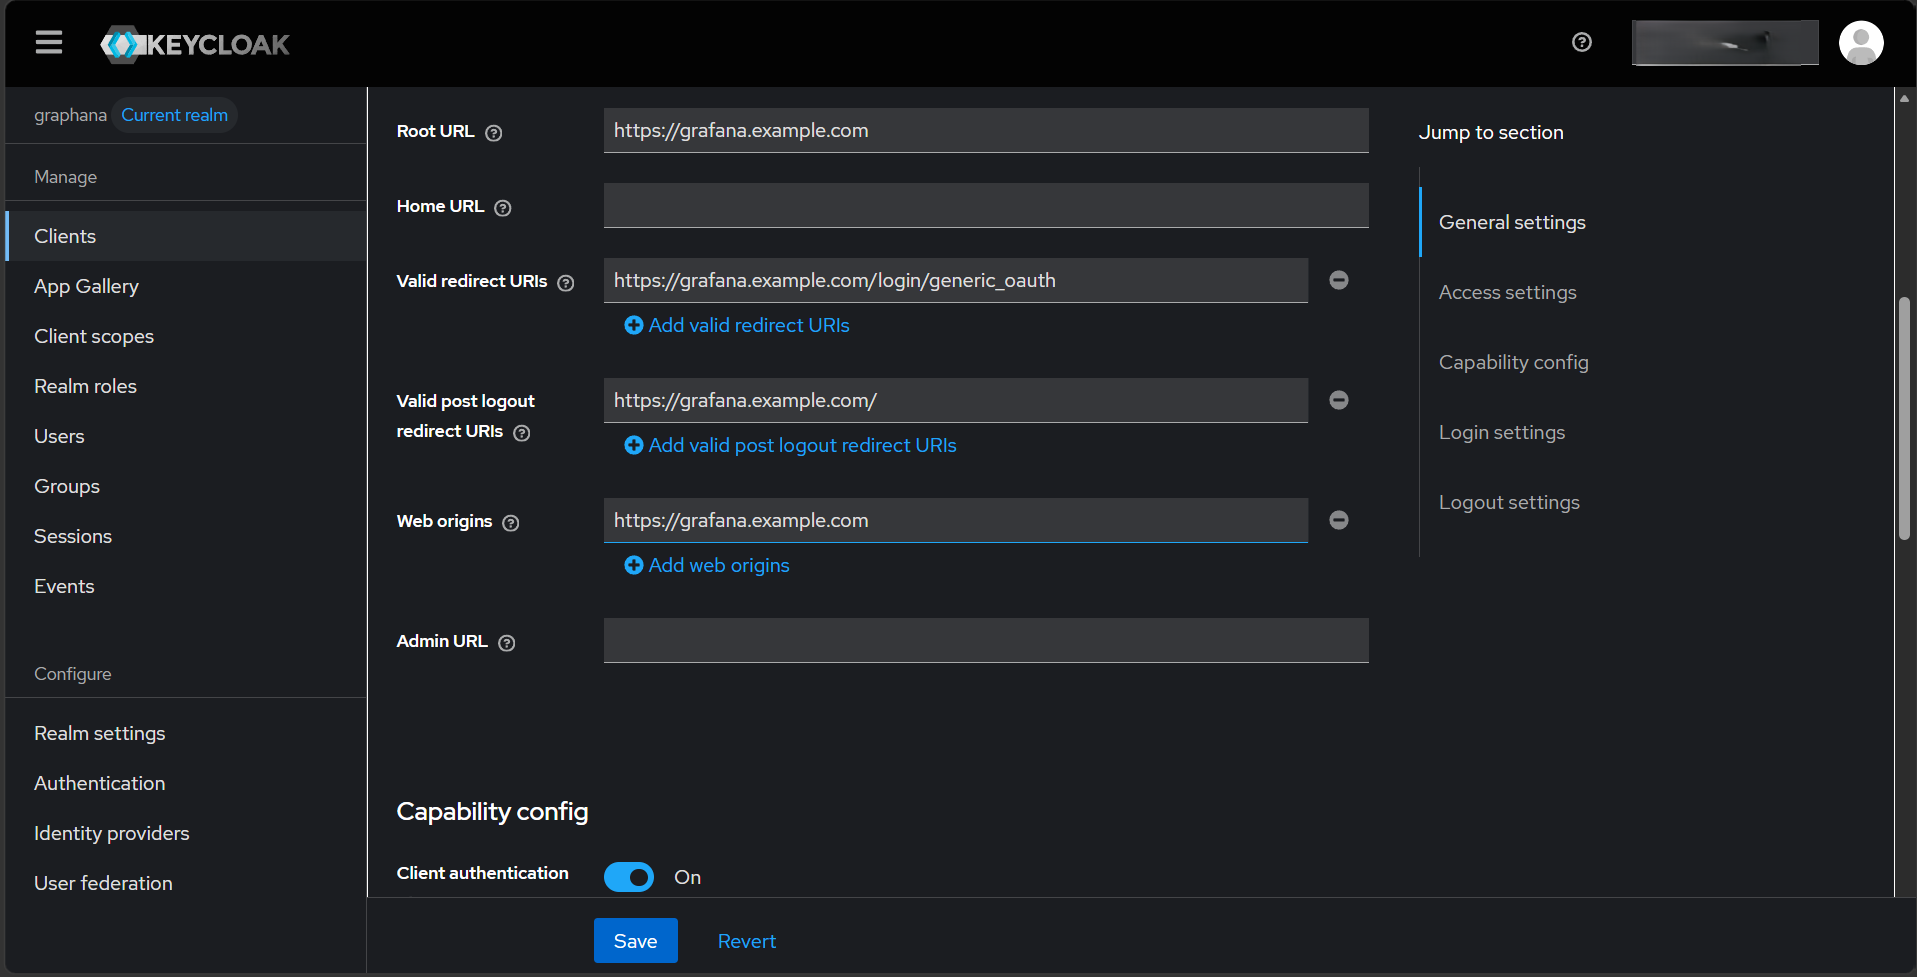
Capability config:
- Client authentication: ON
- Standard flow: ON
- Direct access grants: OFF
- Click Next
Login settings:
Replace
grafana.example.comwith your actual Grafana domain in all four fields below.
- Root URL:
https://grafana.example.com - Valid redirect URIs:
https://grafana.example.com/login/generic_oauth - Valid post logout redirect URIs:
https://grafana.example.com/ - Web origins:
https://grafana.example.com
1.1 — Copy the client secret
Clients → grafana → Credentials → copy the client secret.

1.2 — Add a role mapper for Grafana org roles (optional)
Skip this section if you only need basic authentication. Come back here when you want Keycloak roles to control what Grafana org role each user gets.
Create roles on the grafana client:
- Clients → grafana → Roles → Create role
- Add three roles:
grafana-admin,grafana-editor,grafana-viewer
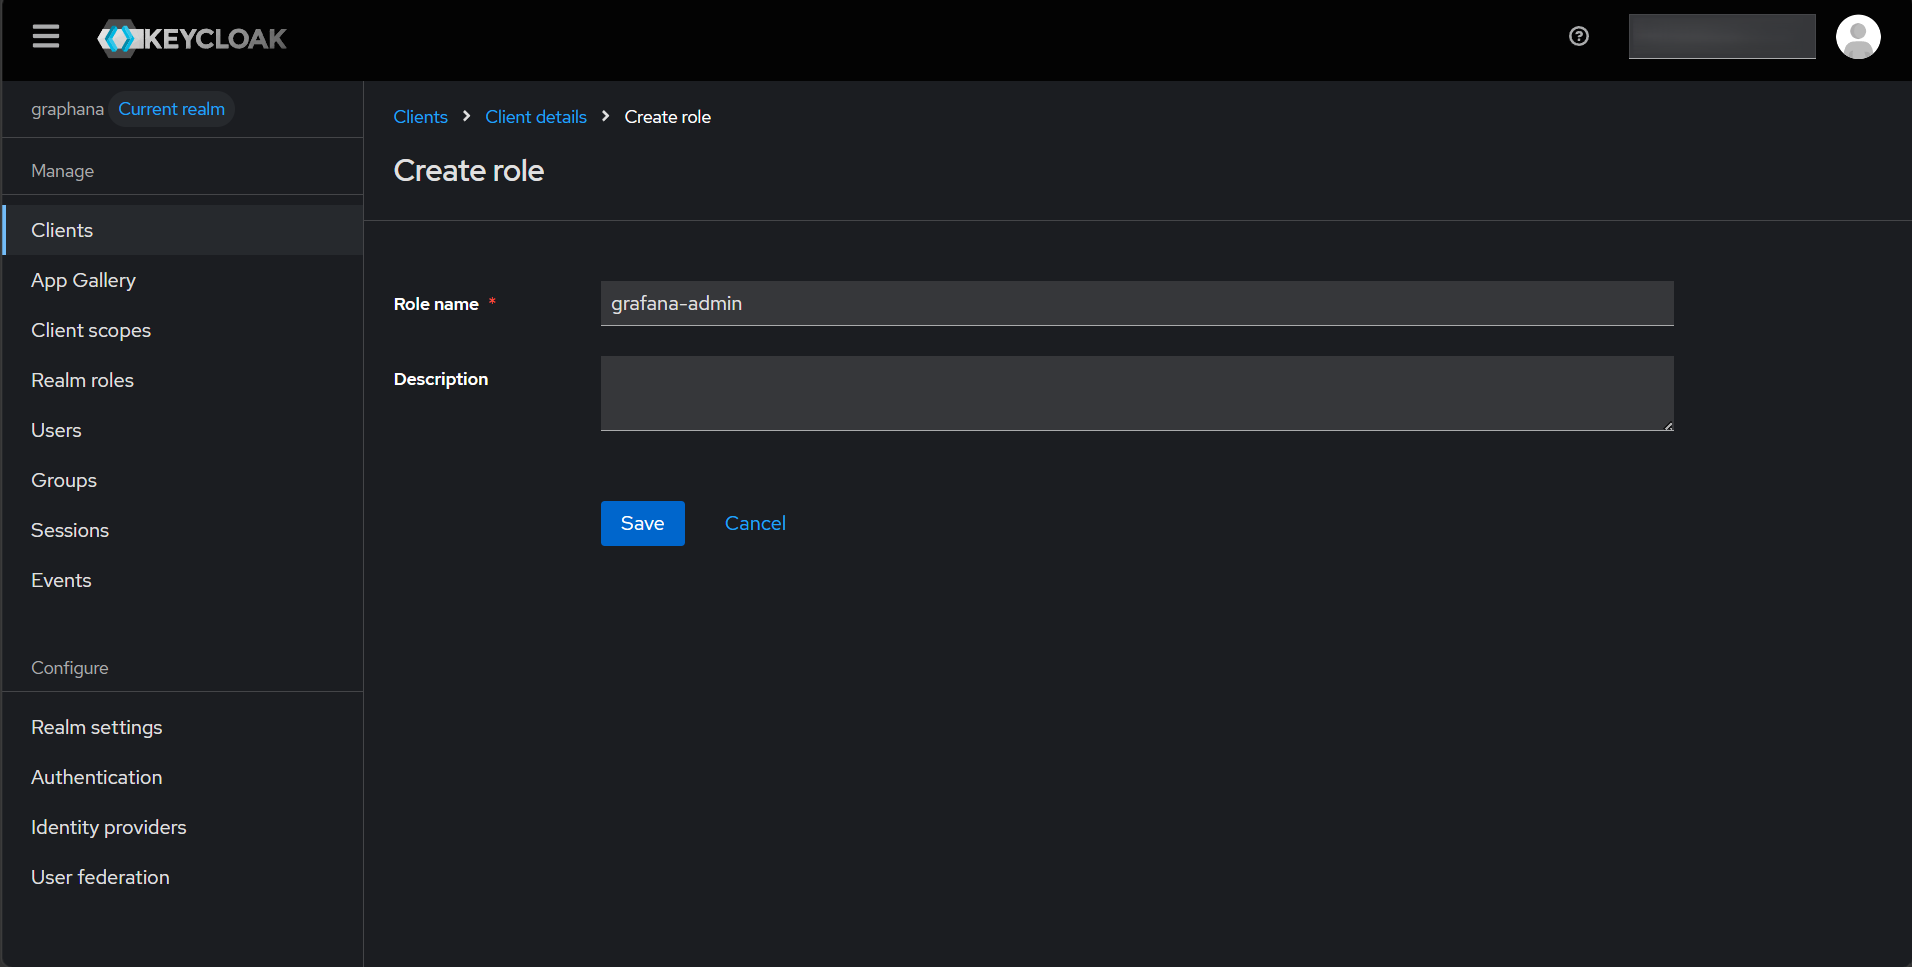
Important: Create the mapper first (below) before assigning these roles to users.
Add a mapper to include those roles in the access token:
- Clients → grafana → Client scopes → grafana-dedicated → Add mapper → By configuration
- Select User Client Role
- Name:
grafana-roles-mapper - Token Claim Name:
grafana_roles - Add to ID token: ON
- Add to access token: ON
- Save

Then assign these roles to your Keycloak users via Users → [user] → Role mapping → grafana client roles.
Step 2 — Configure Grafana
Grafana reads OAuth config from its ini file or from environment variables. Environment variables are easier in Docker and Kubernetes.
2.1 — Using the ini file
Edit the file at /etc/grafana/grafana.ini.
Location varies by OS:
/etc/grafana/on Linux,C:\Program Files\GrafanaLabs\grafana\conf\on Windows, or viadocker execin containers.
Editing with vi on Linux:
sudo vi /etc/grafana/grafana.ini
- Press
ito enter insert mode and make your changes. - Press
Escto exit insert mode. - Type
:wqand pressEnterto save and quit. - If you opened the file inside a Docker container, exit the shell afterward and restart the container so Grafana picks up the change.
If the file shows as read-only inside a container (e.g.
/etc/grafana/grafana.inimounted:ro), edit a local copy and push it in withdocker cp, or switch to the environment-variable approach in Step 2.2 instead.
[server]
root_url = https://grafana.example.com

[auth.generic_oauth]
enabled = true
name = Keycloak
allow_sign_up = true
client_id = grafana
client_secret = <paste-from-step-1.1>
scopes = openid email profile
auth_url = https://keycloak.example.com/realms/YOUR_REALM/protocol/openid-connect/auth
token_url = https://keycloak.example.com/realms/YOUR_REALM/protocol/openid-connect/token
api_url = https://keycloak.example.com/realms/YOUR_REALM/protocol/openid-connect/userinfo
login_attribute_path = preferred_username
name_attribute_path = name
email_attribute_path = email

# Role mapping — remove this line if you skipped Step 1.2
role_attribute_path = contains(realm_access.roles[*], 'grafana-admin') && 'Admin' || contains(realm_access.roles[*], 'grafana-editor') && 'Editor' || 'Viewer'
Replace
YOUR_REALMwith your realm name andkeycloak.example.comwith your Keycloak hostname.
2.2 — Using environment variables (Docker)
If Grafana is running as a Docker Compose service, add the following environment variables directly to the grafana service in your docker-compose.yml, rather than editing grafana.ini:
grafana:
  image: grafana/grafana
  container_name: grafana
  ports:
    - "3001:3000"
  restart: unless-stopped
  environment:
    - GF_SERVER_ROOT_URL=https://grafana.example.com
    - GF_AUTH_GENERIC_OAUTH_ENABLED=true
    - GF_AUTH_GENERIC_OAUTH_NAME=Keycloak
    - GF_AUTH_GENERIC_OAUTH_ALLOW_SIGN_UP=true
    - GF_AUTH_GENERIC_OAUTH_CLIENT_ID=grafana
    - GF_AUTH_GENERIC_OAUTH_CLIENT_SECRET=<paste-from-step-1.1>
    - GF_AUTH_GENERIC_OAUTH_SCOPES=openid email profile
    - GF_AUTH_GENERIC_OAUTH_AUTH_URL=https://keycloak.example.com/realms/YOUR_REALM/protocol/openid-connect/auth
    - GF_AUTH_GENERIC_OAUTH_TOKEN_URL=https://keycloak.example.com/realms/YOUR_REALM/protocol/openid-connect/token
    - GF_AUTH_GENERIC_OAUTH_API_URL=https://keycloak.example.com/realms/YOUR_REALM/protocol/openid-connect/userinfo
    - GF_AUTH_GENERIC_OAUTH_LOGIN_ATTRIBUTE_PATH=preferred_username
    - GF_AUTH_GENERIC_OAUTH_NAME_ATTRIBUTE_PATH=name
    - GF_AUTH_GENERIC_OAUTH_EMAIL_ATTRIBUTE_PATH=email
    - GF_AUTH_GENERIC_OAUTH_ROLE_ATTRIBUTE_PATH=contains(realm_access.roles[*], 'grafana-admin') && 'Admin' || contains(realm_access.roles[*], 'grafana-editor') && 'Editor' || 'Viewer'
Replace
YOUR_REALMwith your realm name andkeycloak.example.comwith your Keycloak hostname. Adjust the port mapping (3001:3000) to match your existing setup.
Then apply the changes:
docker compose up -d --force-recreate grafana
Note: Environment variables take priority over
grafana.ini. If you previously editedgrafana.ini, you don't need to revert it — these will override it automatically.
Step 3 — Restart Grafana and test the login
# Systemd
sudo systemctl restart grafana-server

# Docker Compose
docker compose restart grafana
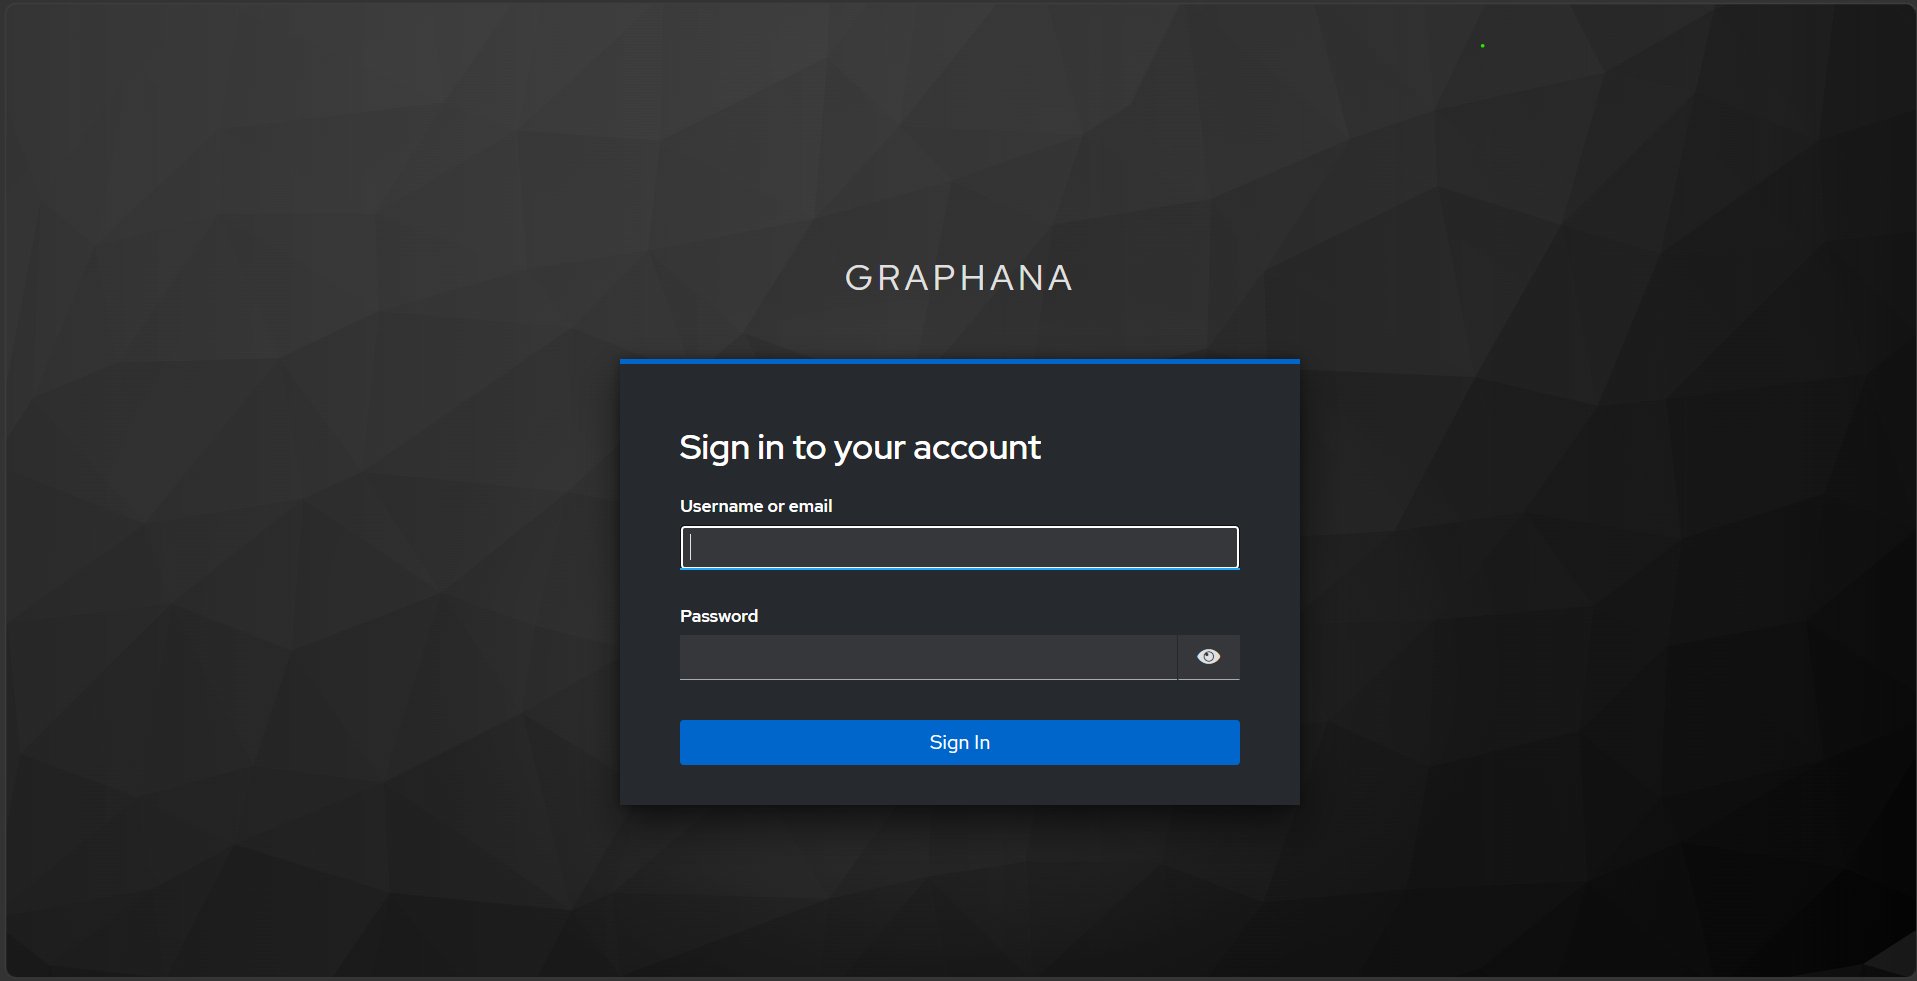
Open Grafana in a browser. A Sign in with Keycloak button appears below the username/password fields.
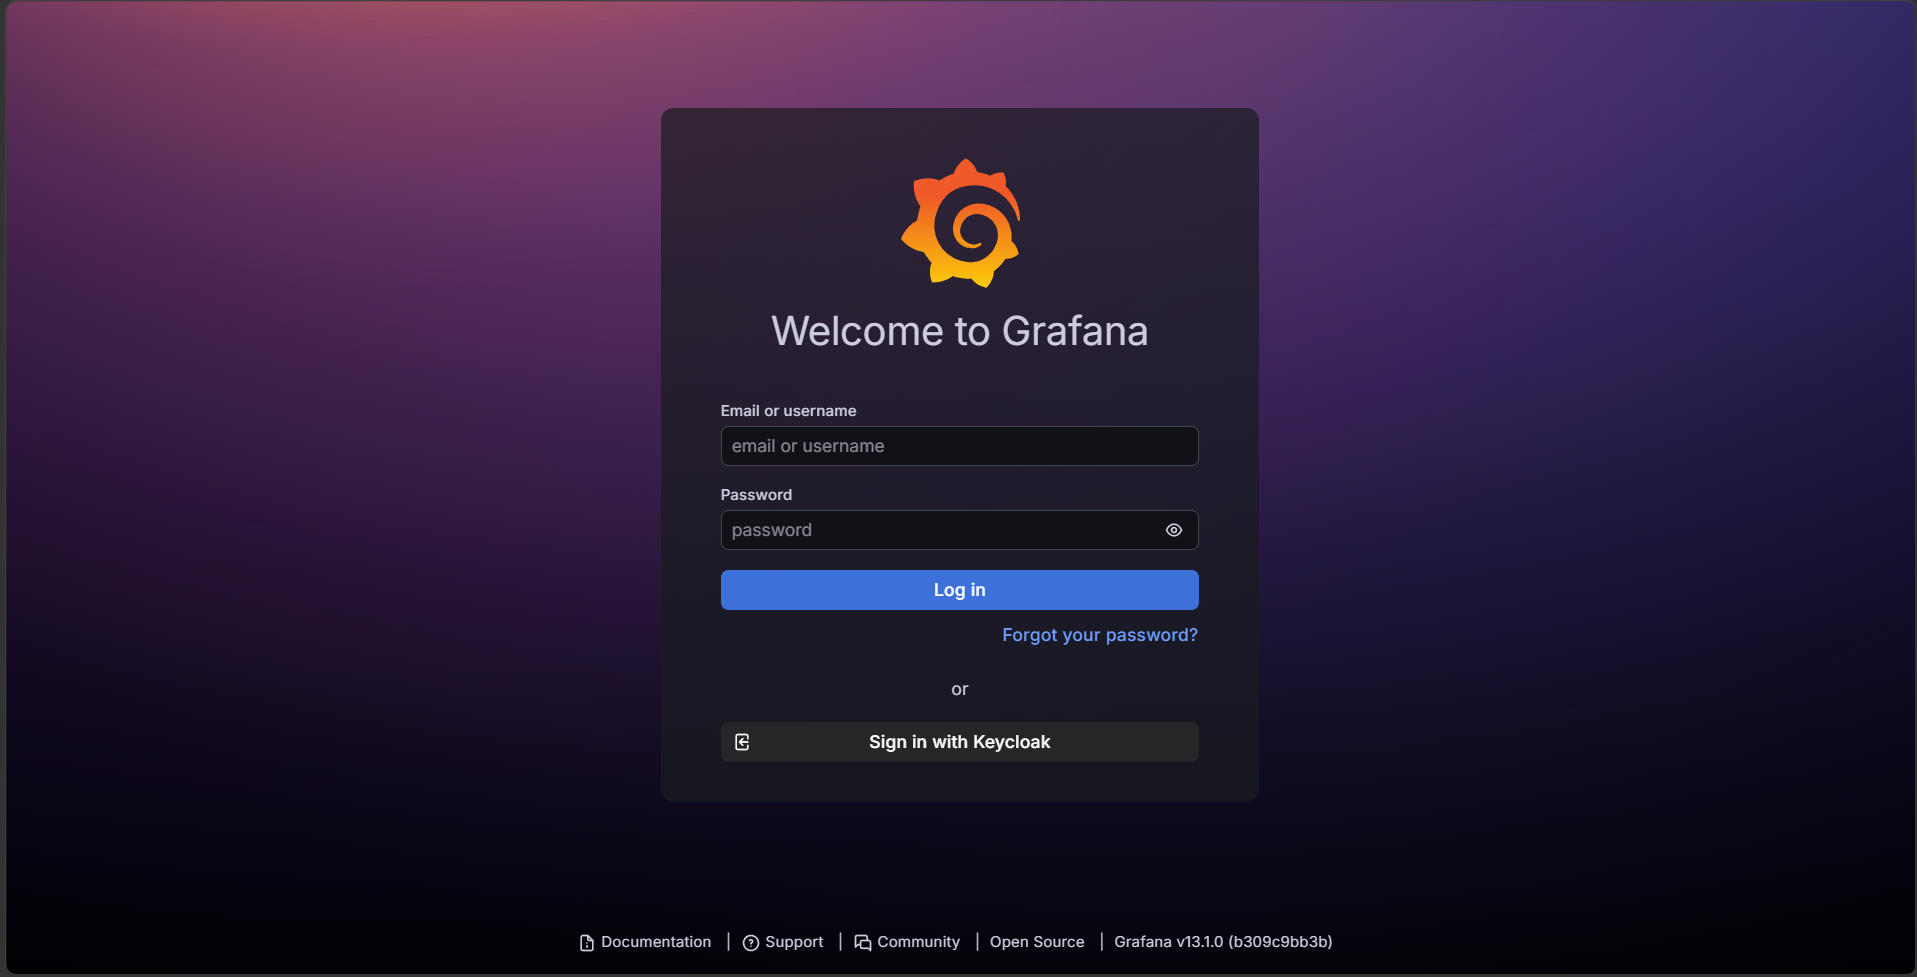
Click the button. Keycloak handles authentication:
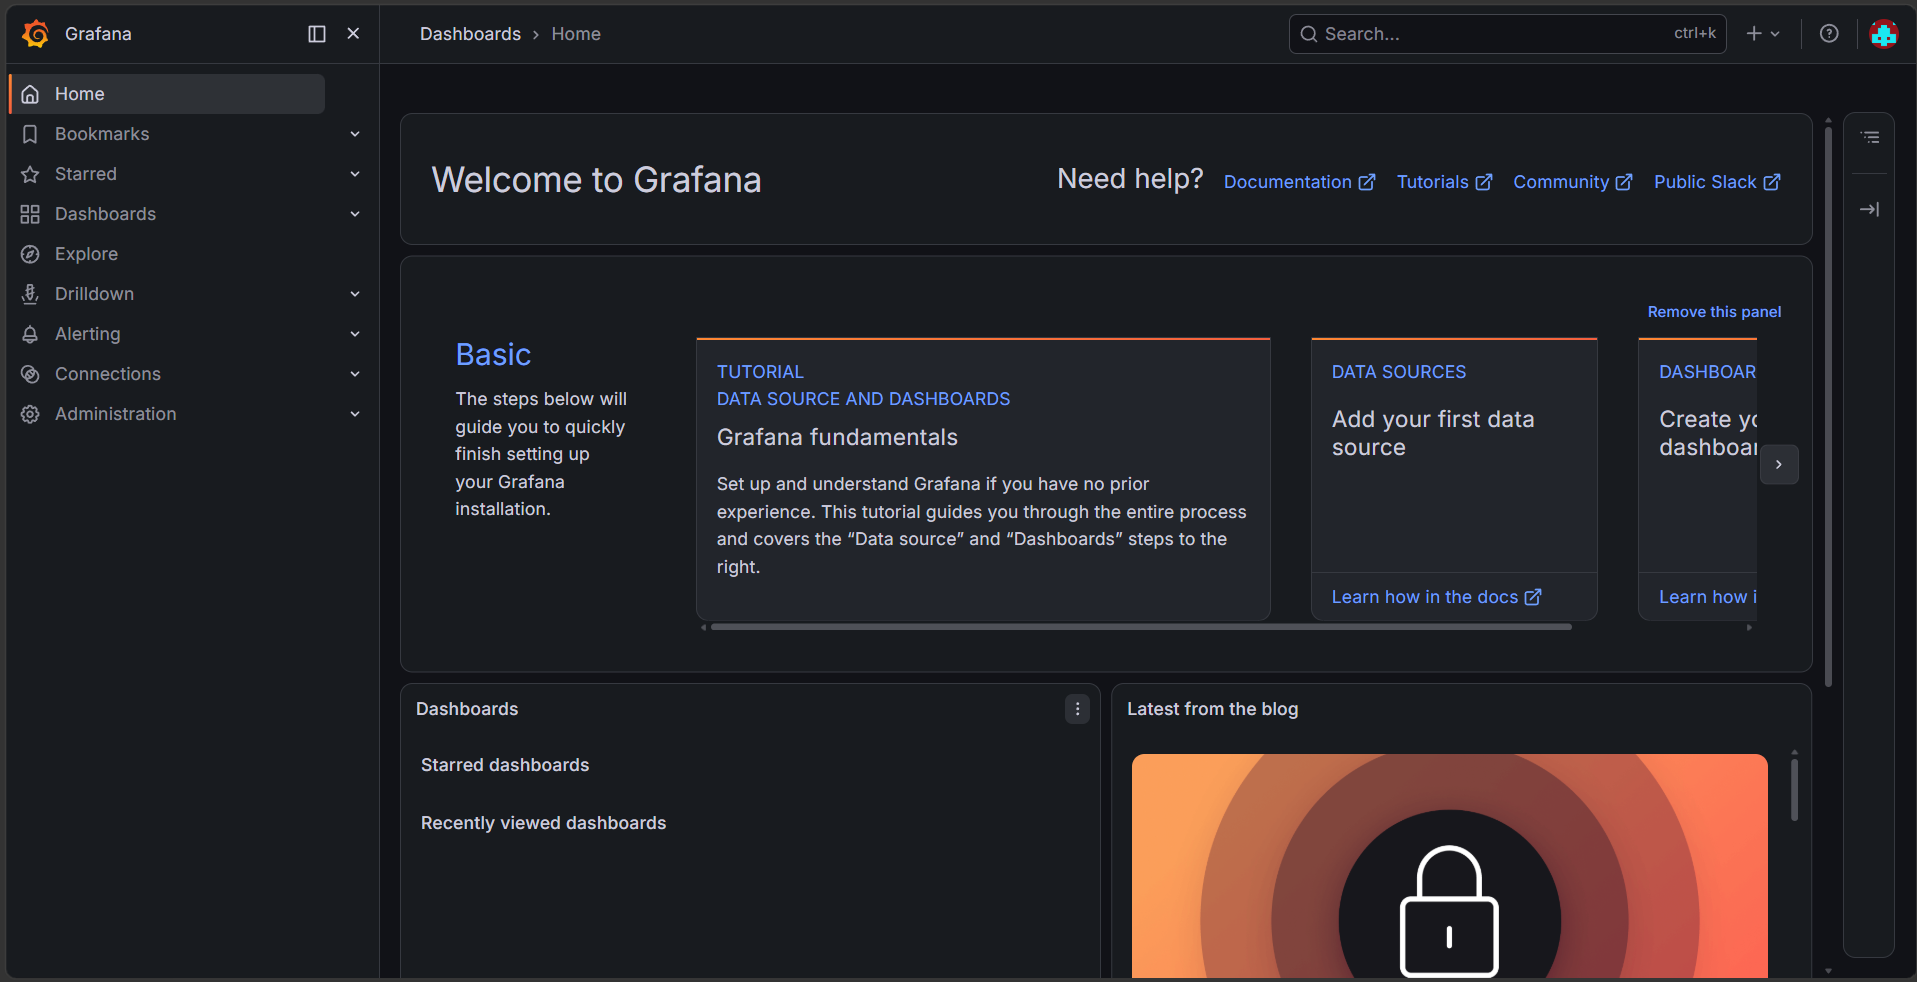
After login, Grafana shows the home dashboard. The user's name and email come from the Keycloak userinfo endpoint:
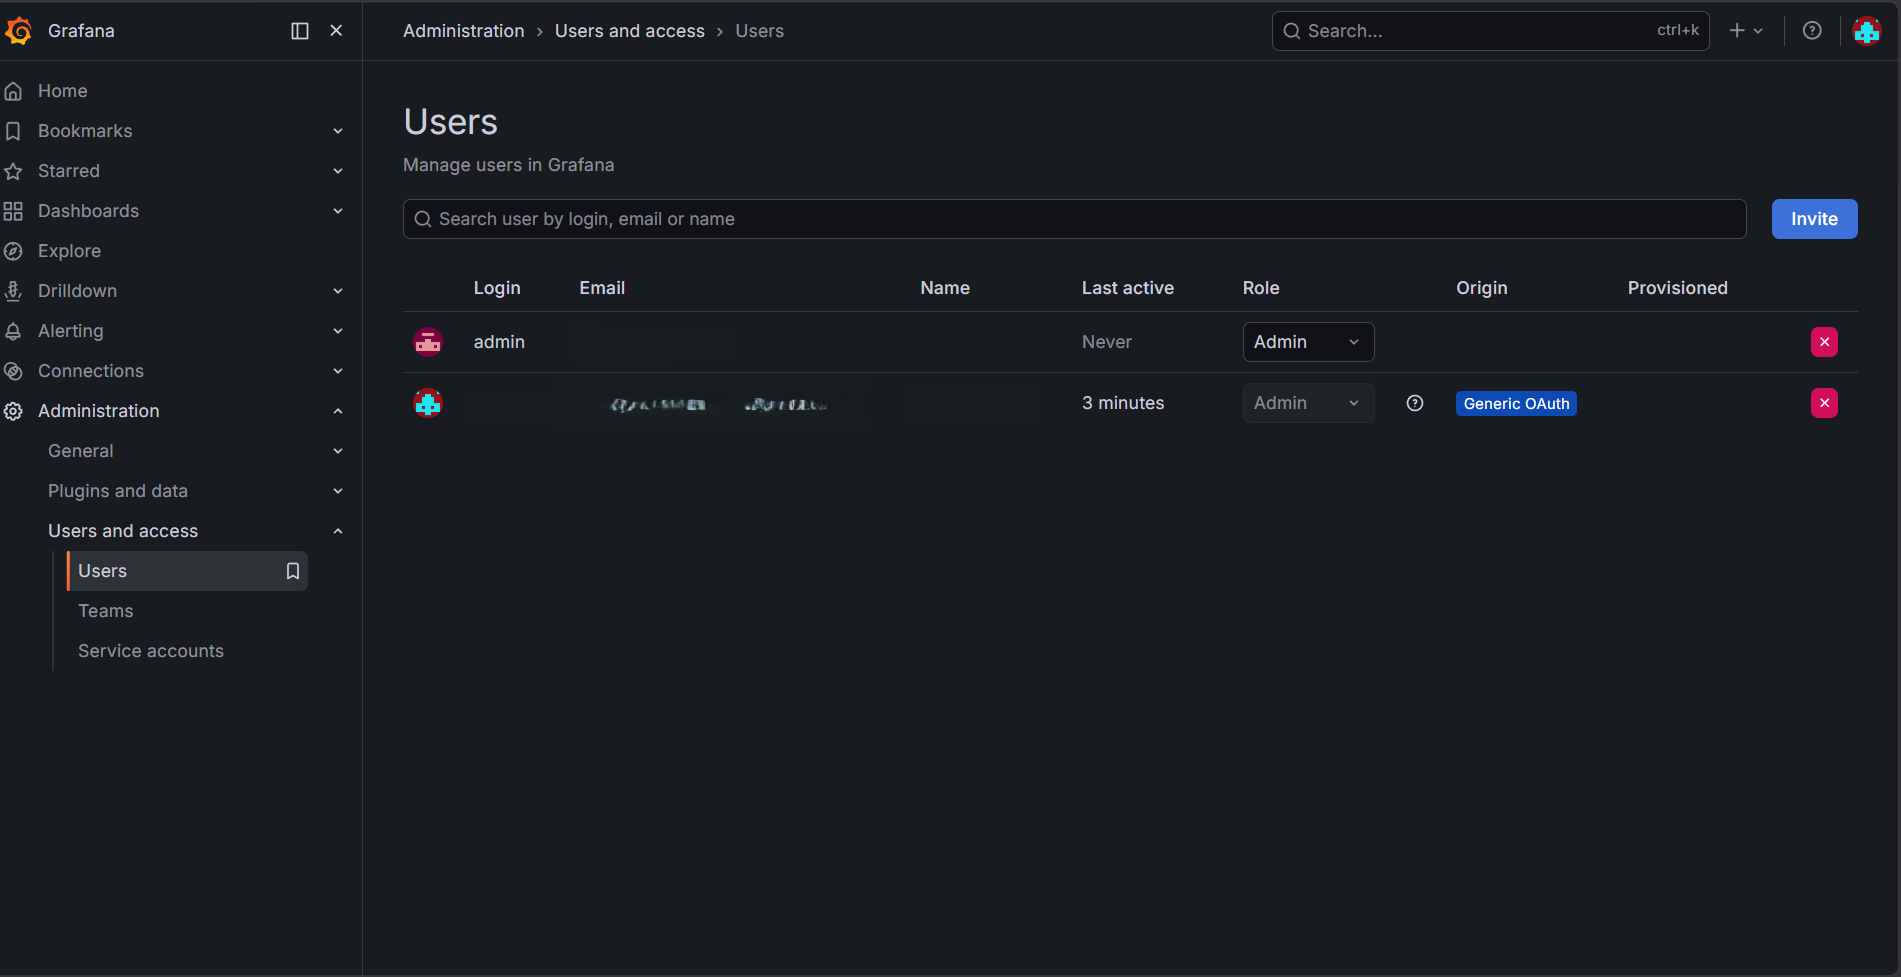
Step 4 — Verify role mapping
Go to Administration → Users. Each Keycloak user's org role should match the grafana-admin, grafana-editor, or grafana-viewer role assigned in Keycloak.
If roles are not mapping, enable debug logging temporarily.
If you're using grafana.ini:
[log]
level = debug
Then restart Grafana:
docker restart grafana
If you're using docker-compose env vars:
- GF_LOG_LEVEL=debug
Then recreate the container:
docker compose up -d --force-recreate grafana
Trigger a login, then search the logs:
docker logs grafana 2>&1 | grep oauth.generic_oauth
The debug output includes the full token payload. Find the grafana_roles array (or realm_access.roles if you're using realm roles) and confirm it contains the values you expect.
Remember to turn debug logging back off afterward (
GF_LOG_LEVEL=info, or remove the[log]block) — debug logs can include sensitive token data.
Step 5 — Auto-login (skip the Grafana login page)
To send unauthenticated users straight to Keycloak without showing the Grafana login page:
If you're using grafana.ini:
[auth]
disable_login_form = true

[auth.generic_oauth]
# ... existing config ...
auto_login = true
Then restart Grafana:
docker restart grafana
If you're using docker-compose env vars:
- GF_AUTH_DISABLE_LOGIN_FORM=true
- GF_AUTH_GENERIC_OAUTH_AUTO_LOGIN=true
Then recreate the container:
docker compose up -d --force-recreate grafana
Keep disable_login_form (or GF_AUTH_DISABLE_LOGIN_FORM) set to false during initial testing. That way, you can still reach the Grafana admin account via local login if the OAuth config breaks something.
Step 6 — Single logout
When a user signs out of Keycloak, Grafana can terminate their session too. Add the end-session URL.
If you're using grafana.ini:
[auth.generic_oauth]
# ... existing config ...
signout_redirect_url = https://keycloak.example.com/realms/YOUR_REALM/protocol/openid-connect/logout?redirect_uri=https%3A%2F%2Fgrafana.example.com%2Flogin
Then restart Grafana:
docker restart grafana
If you're using docker-compose env vars:
- GF_AUTH_GENERIC_OAUTH_SIGNOUT_REDIRECT_URL=https://keycloak.example.com/realms/YOUR_REALM/protocol/openid-connect/logout?redirect_uri=https%3A%2F%2Fgrafana.example.com%2Flogin
Then recreate the container:
docker compose up -d --force-recreate grafana
URL-encode the redirect_uri value in both cases. After a Keycloak logout, the browser lands back on the Grafana login page.
Troubleshooting common issues
Login button appears but the redirect fails
The redirect URI in Keycloak must match exactly what Grafana sends. Keycloak's error page shows the received URI. Compare it character-by-character against the Valid redirect URIs field. An http/https mismatch or a missing trailing slash will cause this error.
"User not found" after successful Keycloak login
Grafana creates accounts on first login only when allow_sign_up = true. Add that key to [auth.generic_oauth] and restart.
Roles are not mapping
- Enable debug logging and confirm
grafana_rolesappears in the token payload. - If the claim is absent, the role mapper (section 1.2) is misconfigured or not attached to the right client scope.
- Test your JMESPATH expression against the actual token payload using an online JMESPATH evaluator.
Users always get Viewer regardless of their Keycloak role
The role_attribute_path expression evaluates to empty. Check that the claim name (grafana_roles) matches the mapper output exactly, and that the role names in the expression (grafana-admin, grafana-editor) match the Keycloak client role names.
Production checklist
- Redirect URI uses HTTPS — Keycloak rejects HTTP redirect URIs in production
- Client secret stored in an environment variable, not in a committed ini file
-
allow_sign_upset deliberately — usefalseif you want only pre-existing Grafana users to log in via SSO - Role mapping tested for each Keycloak role (Admin, Editor, Viewer)
-
auto_loginenabled only after confirming local admin login still works -
signout_redirect_urlconfigured for single logout - Default Grafana admin password changed before enabling SSO
Need help integrating Grafana with Keycloak?
We deliver production-ready Grafana + Keycloak integrations in 1–3 weeks.
Fixed-price, zero vendor lock-in, full source code ownership.