Keycloak Microsoft Entra ID Identity Provider Setup
Configure Microsoft Entra ID (formerly Azure AD) as an identity provider in Keycloak. Covers app registration in Azure Portal, client secret creation, Keycloak IDP configuration with the built-in Microsoft provider, attribute mappers, and tenant vs multi-tenant setup.
KeycloakPro Team
KeycloakPro Team
Introduction
Configuring Microsoft Entra ID as an identity provider in Keycloak lets users sign in with their Microsoft work or school account (or personal Microsoft account, depending on your app registration). Keycloak has a built-in Microsoft provider type that pre-fills the correct OAuth 2.0 endpoints.
This guide covers both single-tenant setups (your Entra ID tenant only) and multi-tenant setups (any Microsoft account or any organizational account). Keycloak 24+ and a Microsoft Entra ID (formerly Azure Active Directory) tenant are required.
How identity brokering works
The login flow goes: user clicks "Sign in with Microsoft" → Keycloak redirects to Entra ID → user authenticates → Entra ID sends an authorization code to Keycloak's broker endpoint → Keycloak exchanges it for tokens → Keycloak creates or links the user → user lands in your application.
The redirect URI you register in Azure is:
https://keycloak.example.com/realms/YOUR_REALM/broker/Microsoft/endpoint
The alias Microsoft is the default for the built-in Microsoft provider. If you use the generic OIDC provider instead, the alias is whatever you choose.
Prerequisites
- Keycloak 24+ running on HTTPS
- A Keycloak realm with admin access
- An Azure account with permission to create app registrations in a Microsoft Entra ID tenant
Step 1 — Register an application in Azure Portal
Go to the Azure Portal at portal.azure.com:
- Microsoft Entra ID → App registrations → New registration
- Name:
keycloakPro - Supported account types — choose based on your use case:
- Accounts in this organizational directory only — single tenant, your users only
- Accounts in any organizational directory — multi-tenant, users from any Microsoft organization
- Accounts in any organizational directory and personal Microsoft accounts — broadest access
- Redirect URI: Web →
https://keycloak.example.com/realms/YOUR_REALM/broker/Microsoft/endpoint - Click Register
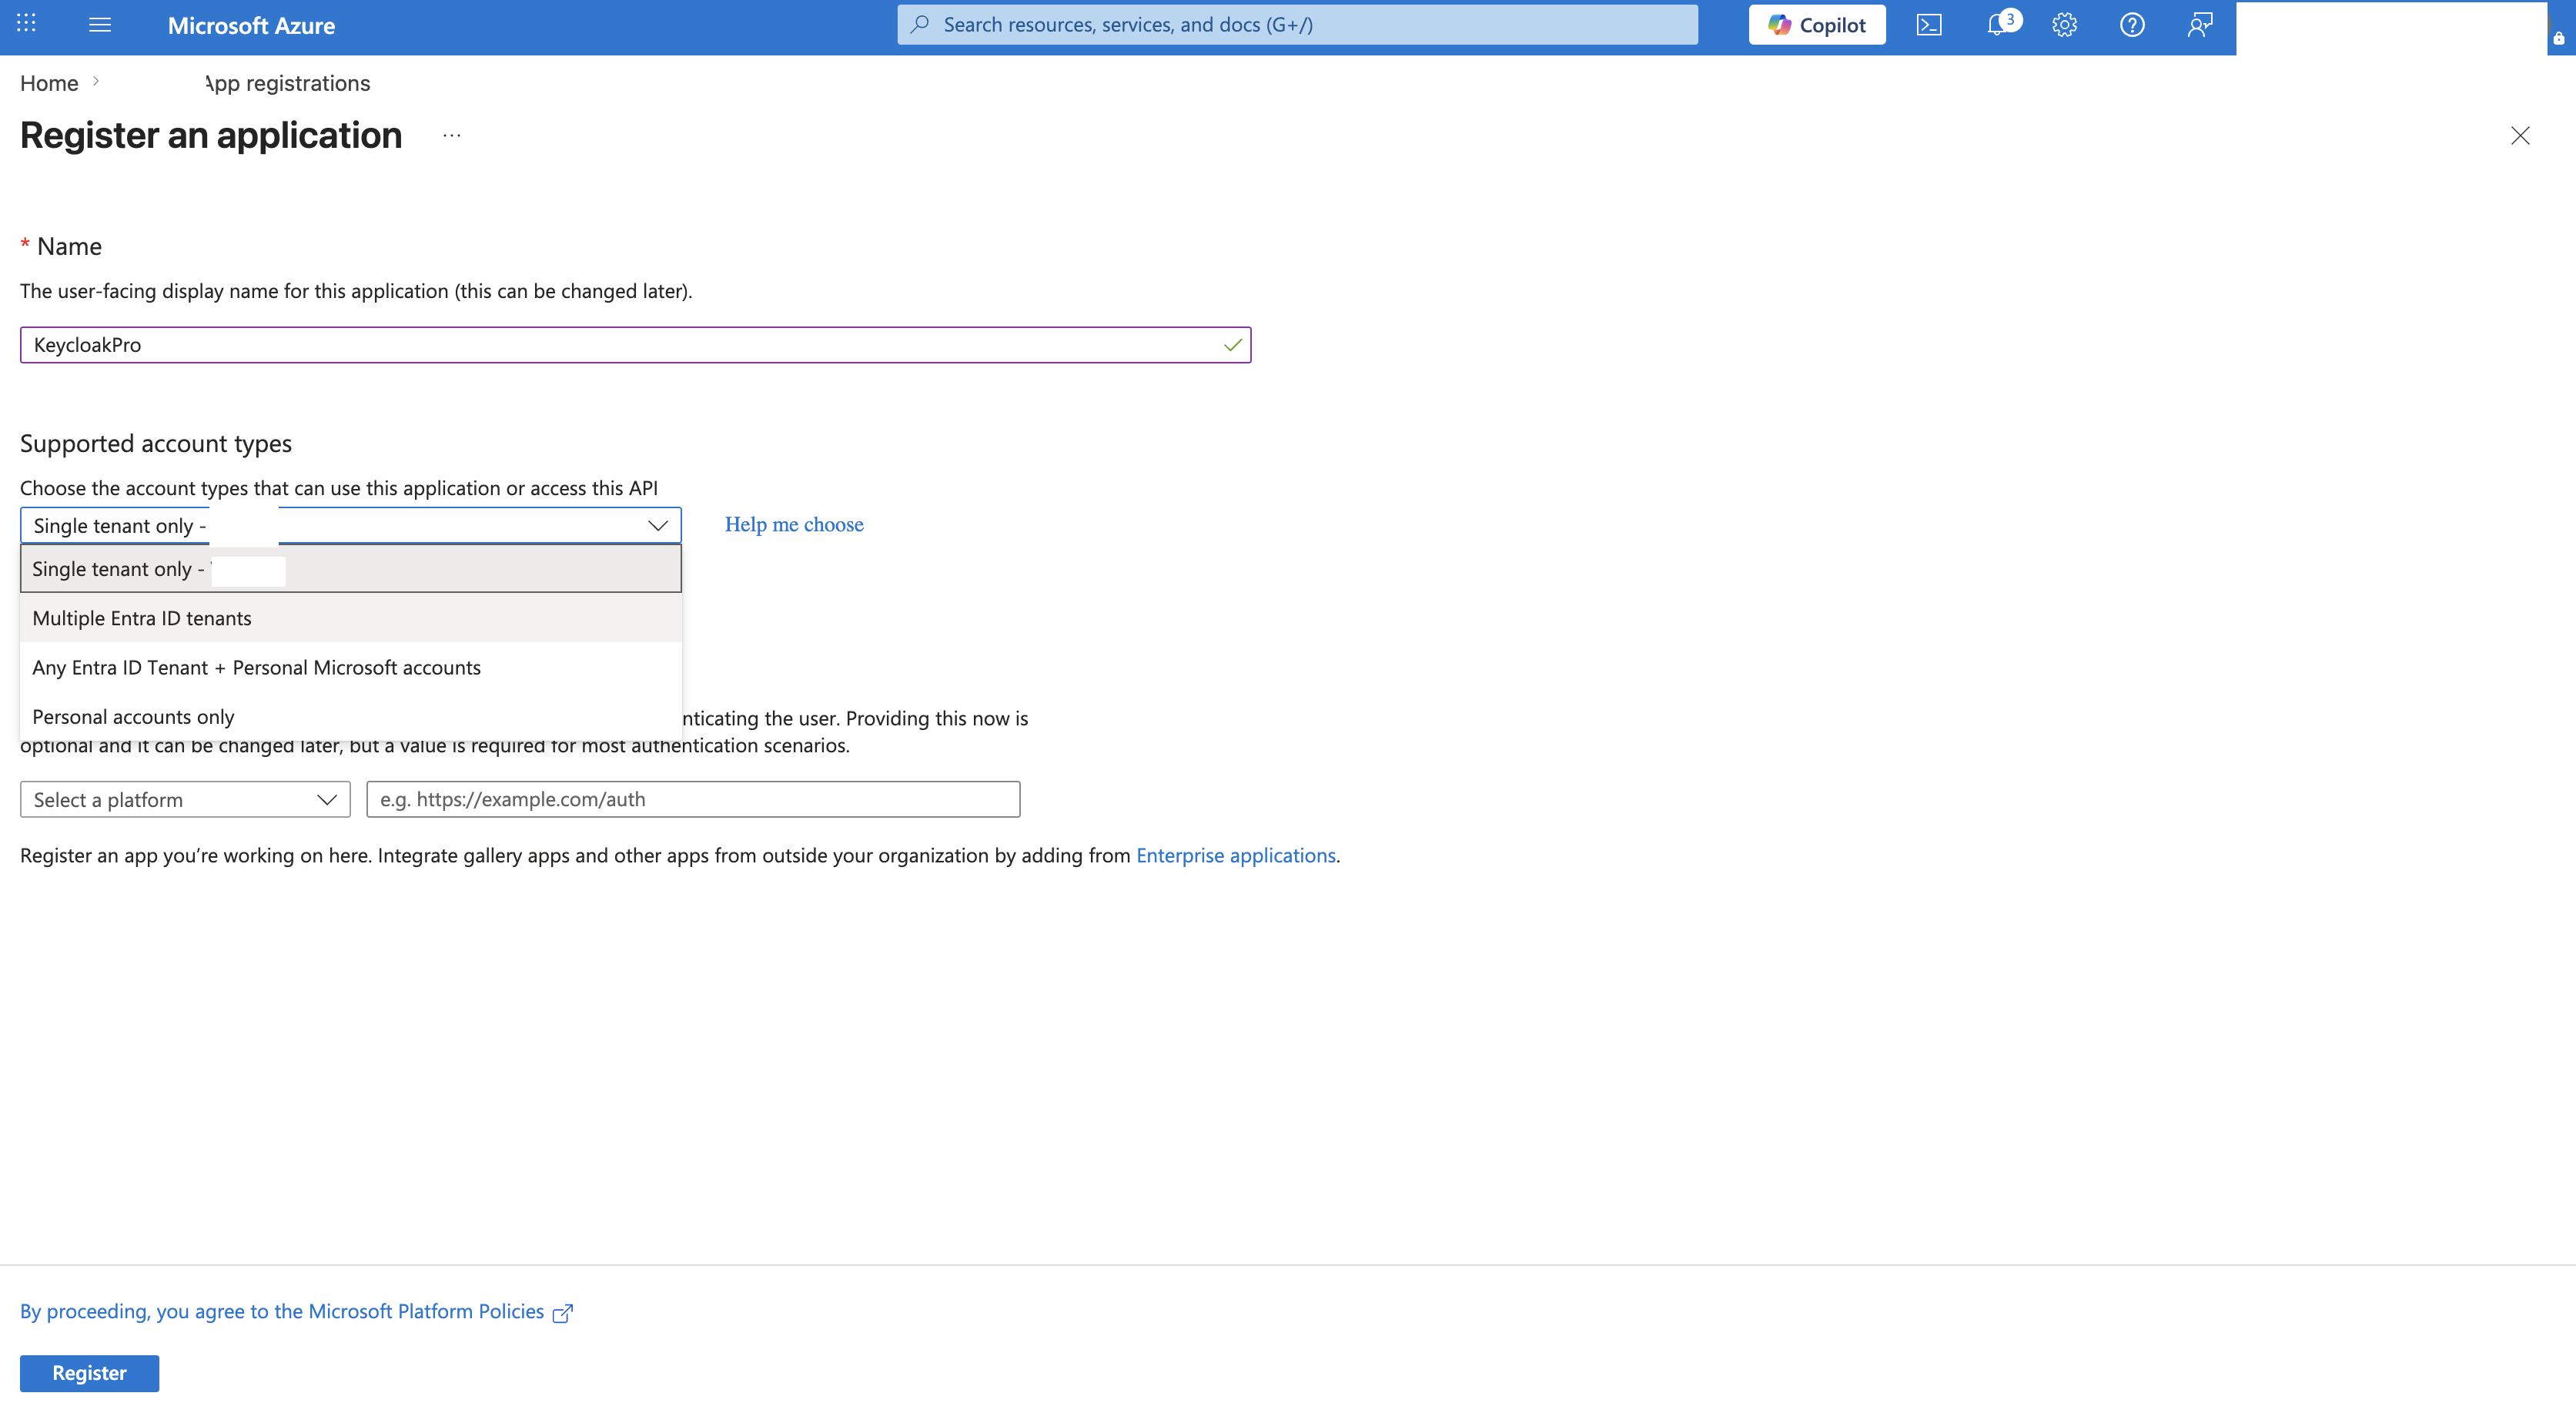
After registration, note the Application (client) ID and Directory (tenant) ID on the app's Overview page. You'll need both.
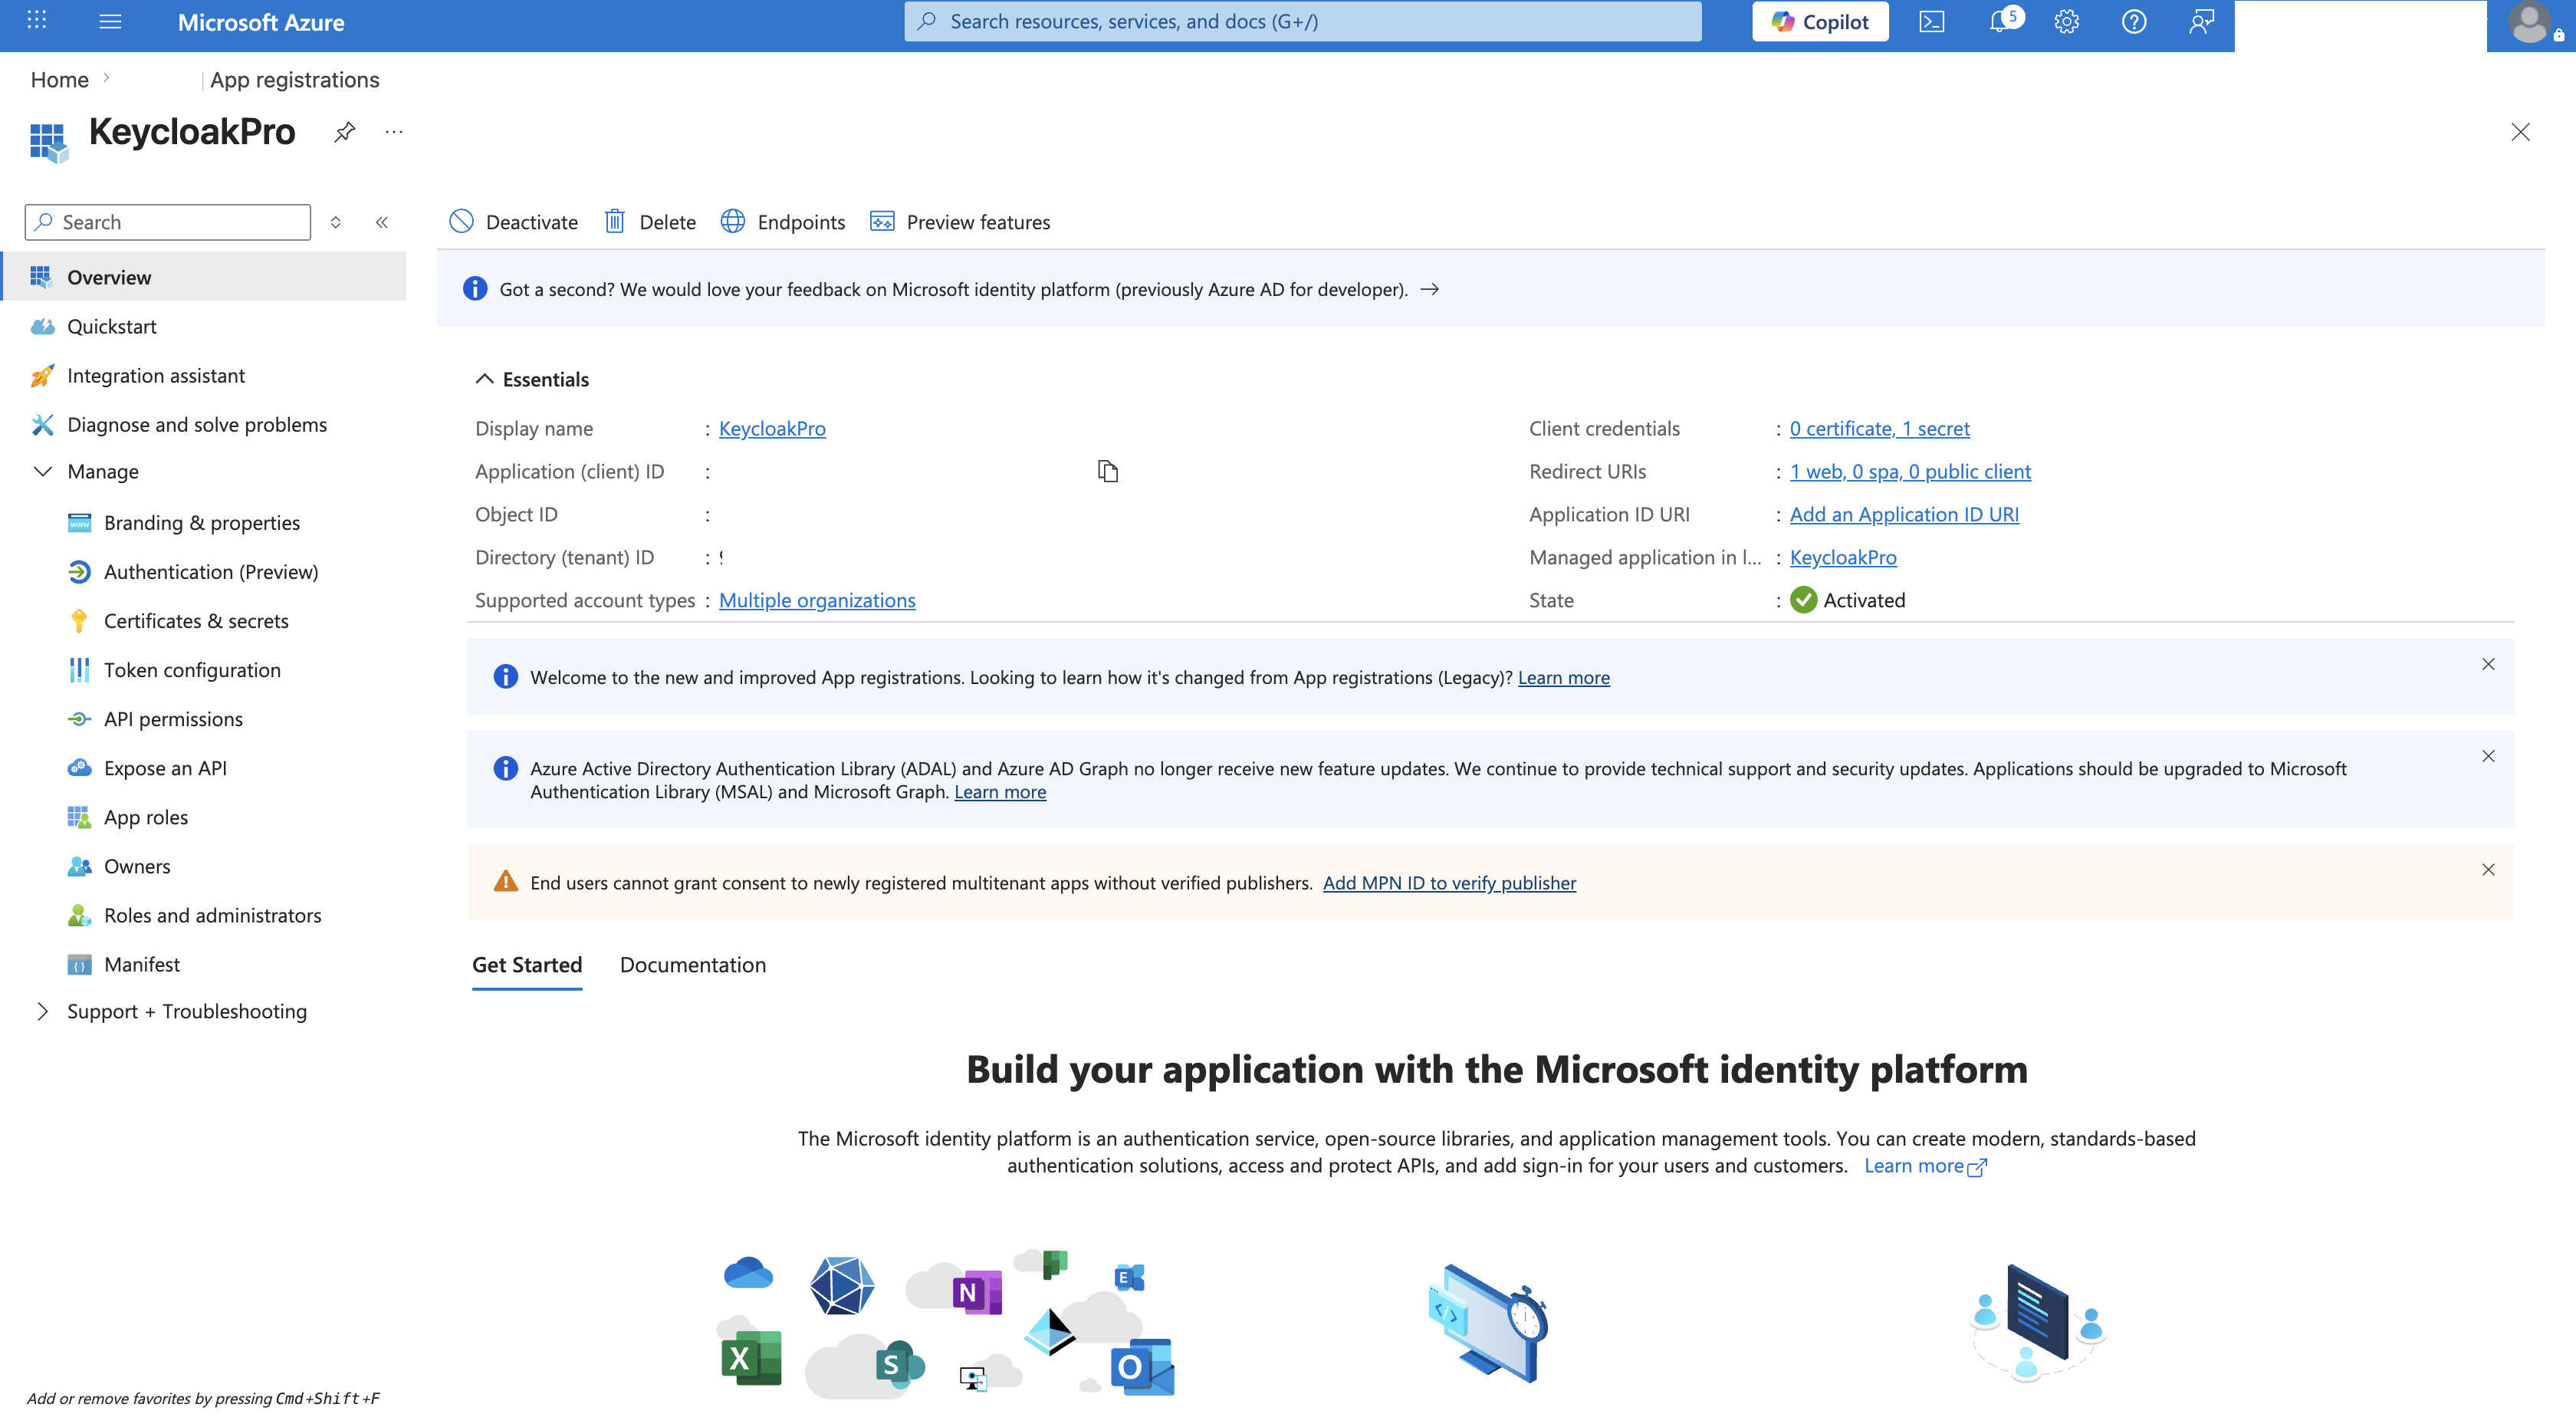
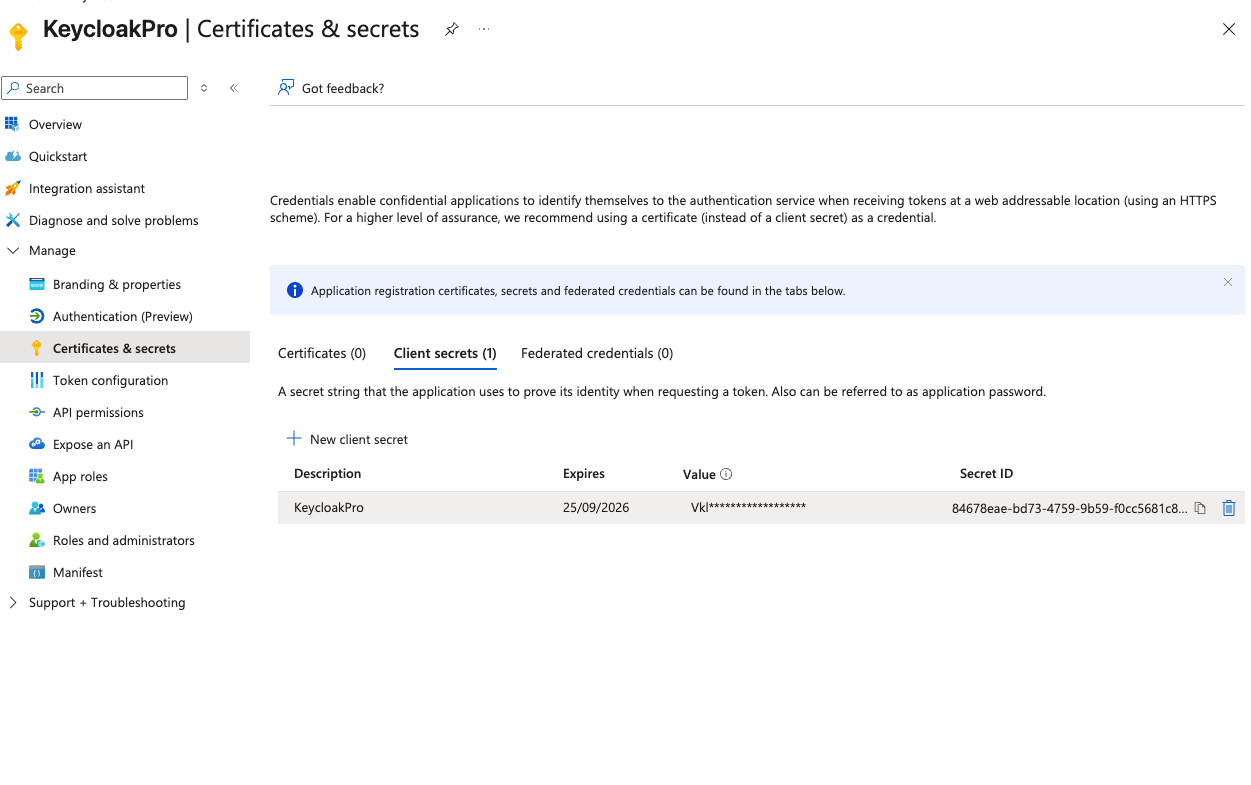
Step 2 — Create a client secret
- Certificates & secrets → New client secret
- Description:
keycloakPro - Expires: choose 12 or 24 months (calendar this for rotation)
- Click Add
- Copy the Value immediately — Azure hides it after you leave the page
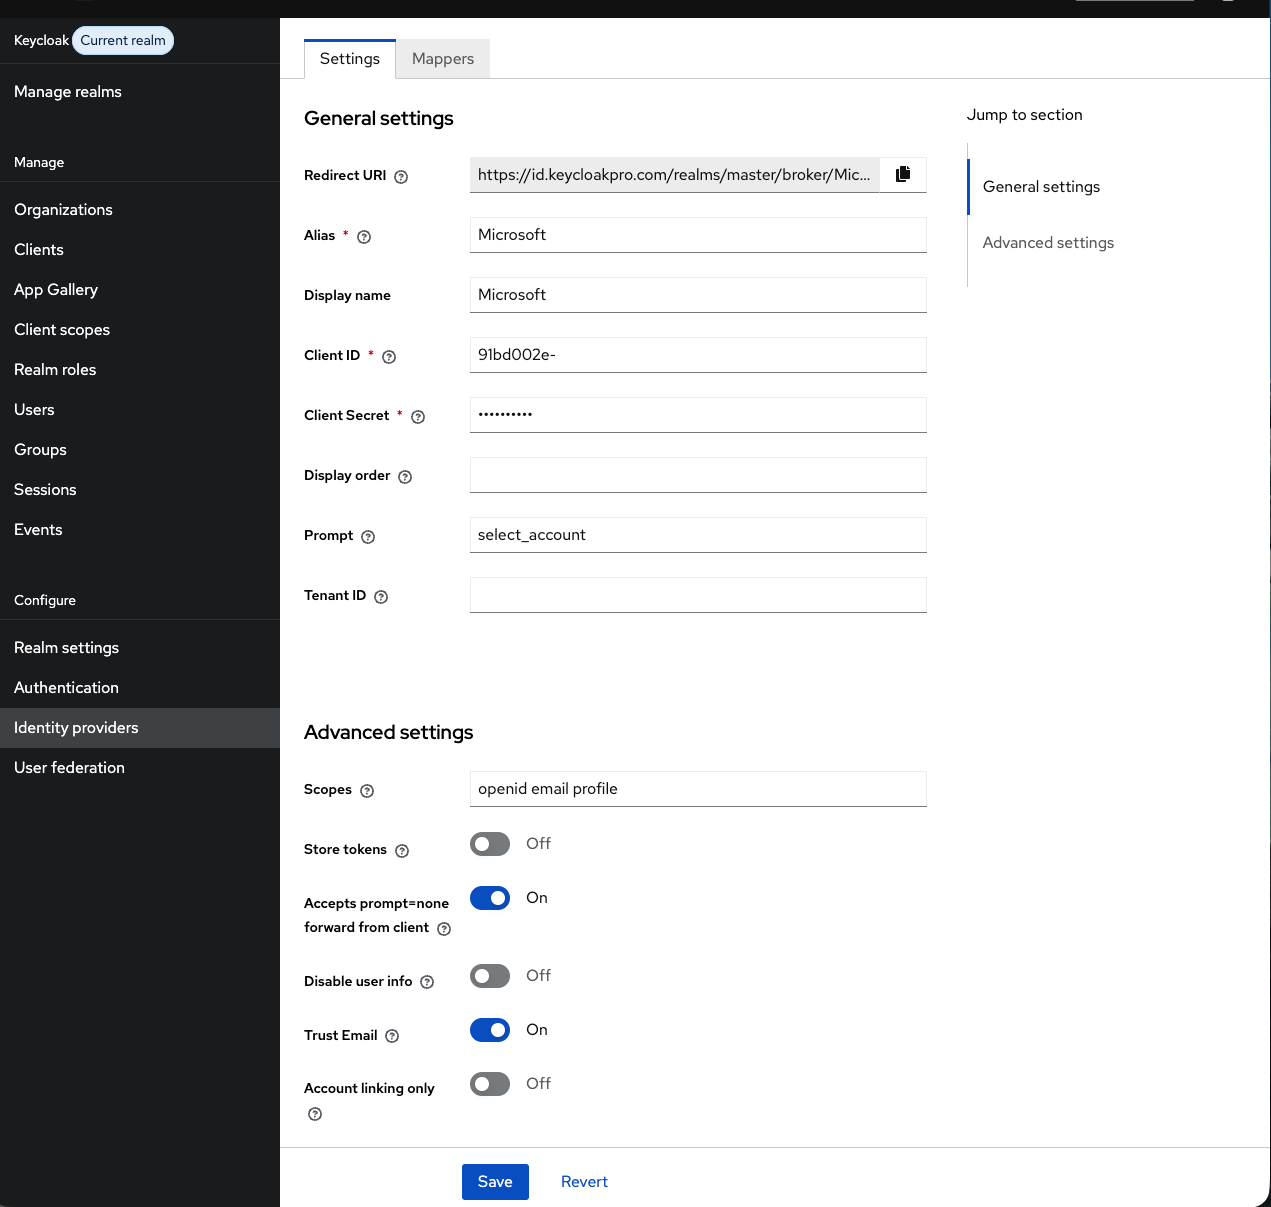
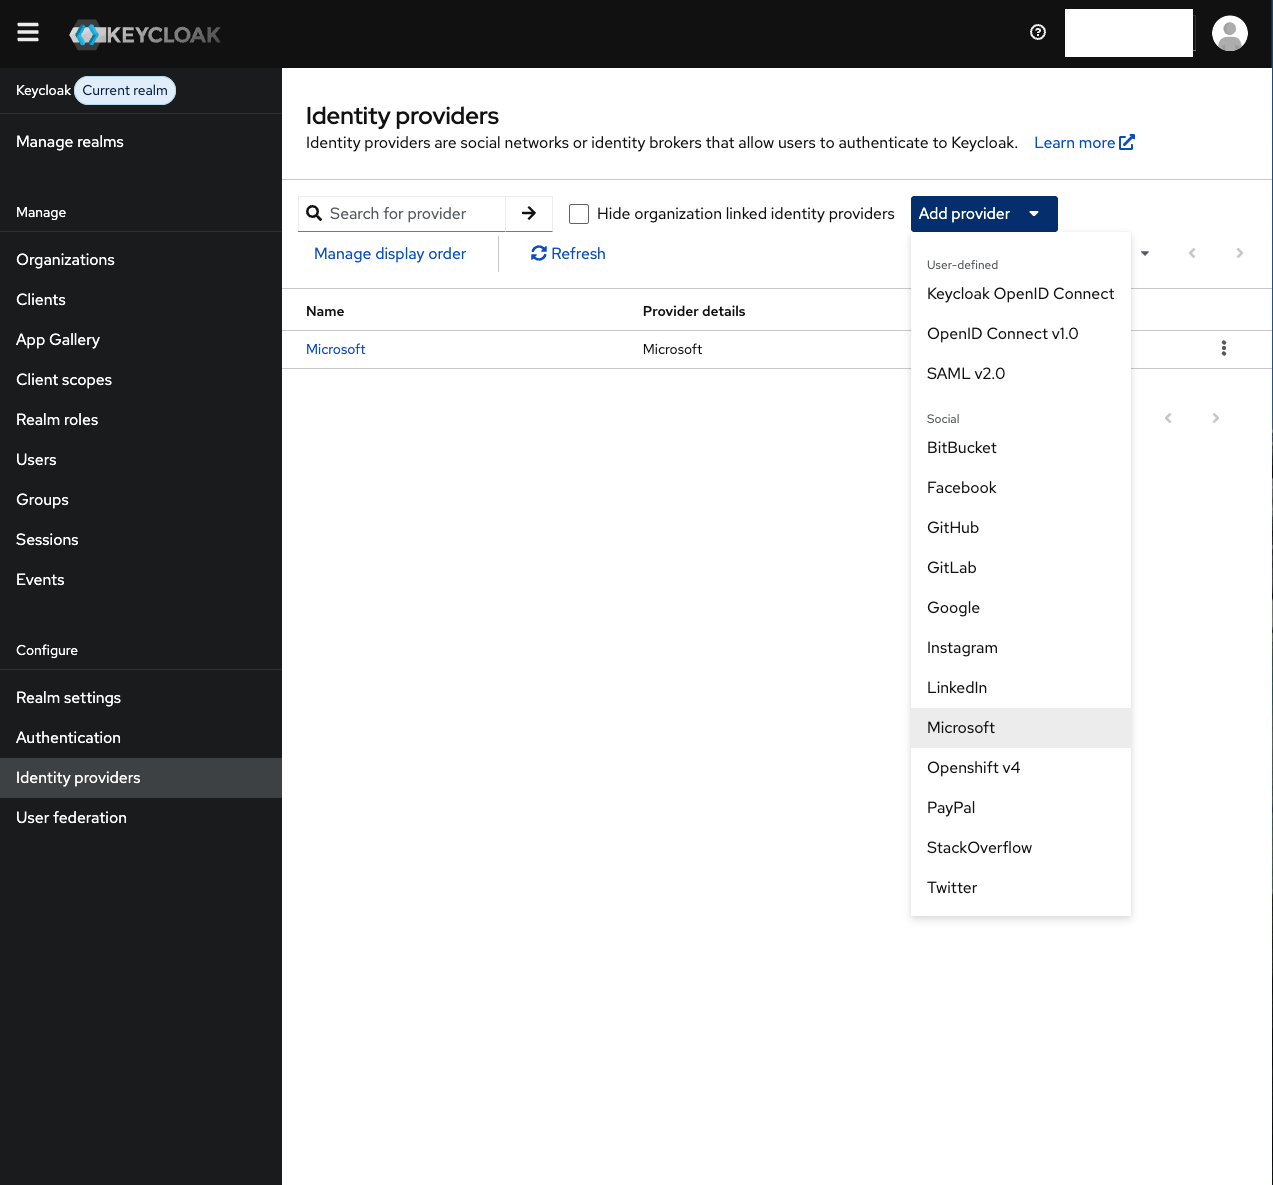
Step 3 — Configure the Identity Provider in Keycloak
In the Keycloak admin console:
- Select your realm
- Identity Providers → Add provider → Microsoft
- Client ID: paste the Application (client) ID from Step 1
- Client Secret: paste the client secret Value from Step 2
- Default Scopes:
openid profile email(Keycloak pre-fills this)
Click Add.
3.1 — Single-tenant restriction (optional)
If you registered a single-tenant app, the built-in Microsoft provider still uses the common endpoint by default. Any user with a valid Microsoft account can attempt login, but Entra ID will reject users outside your tenant during the token exchange.
For a stricter setup using only your tenant's endpoint, use the generic OpenID Connect v1.0 provider instead:
- Identity Providers → Add provider → OpenID Connect v1.0
- Alias:
microsoft - Client ID: Application (client) ID
- Client Secret: client secret Value
- Default Scopes:
openid profile email
This approach locks authentication to your specific Entra ID tenant.
Step 4 — Configure attribute mappers
Microsoft's OIDC token includes these claims by default:
| Entra ID claim | Description |
|---|---|
oid | Unique object ID for the user (stable across sign-ins) |
preferred_username | UPN or email (e.g., [email protected]) |
name | Display name |
email | Email — only if configured as an optional claim |
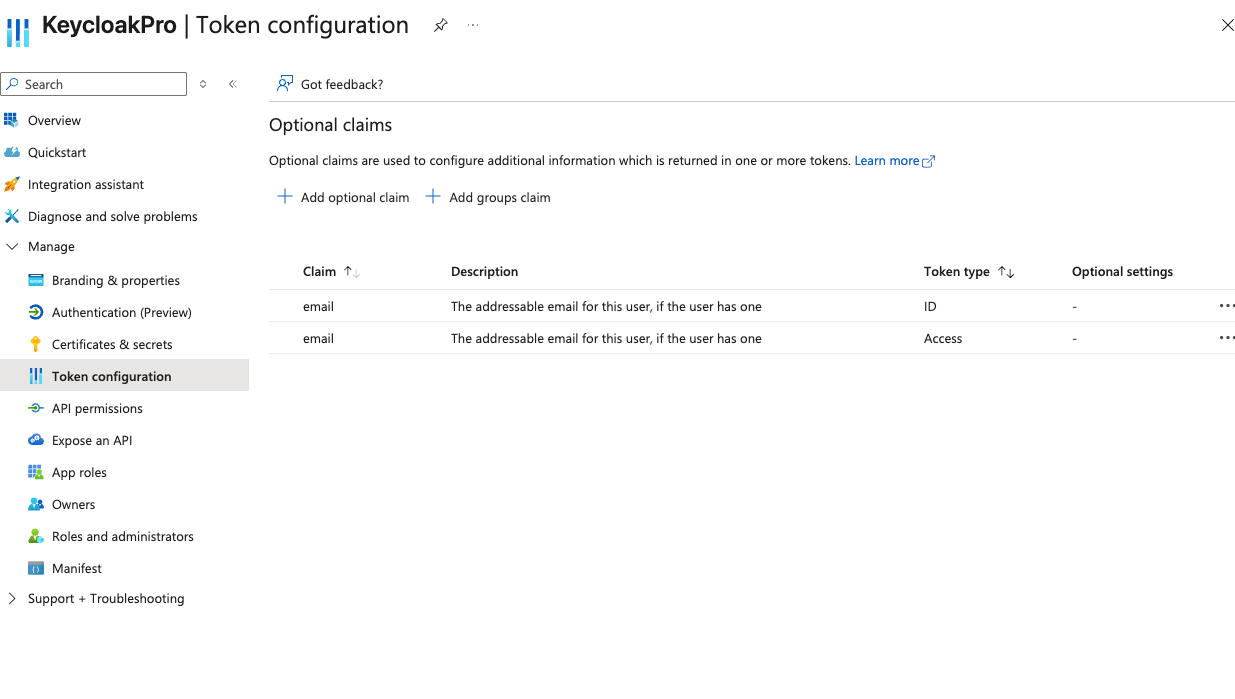
The email claim is not included by default in Entra ID tokens. Add it:
- Azure Portal → App registrations → your app → Token configuration
- Add optional claim → Token type: ID → Claim:
email - Click Add
In Keycloak, add attribute mappers for the built-in Microsoft provider:
- Identity Providers → Microsoft → Mappers → Add mapper
Email mapper:
- Mapper type: Attribute Importer
- Name:
email - Claim:
email(orpreferred_usernameif you didn't add the optional claim) - User Attribute Name:
email
First name mapper:
- Mapper type: Attribute Importer
- Name:
firstName - Claim:
given_name - User Attribute Name:
firstName
Last name mapper:
- Mapper type: Attribute Importer
- Name:
lastName - Claim:
family_name - User Attribute Name:
lastName
Note: given_name and family_name are only present if the user's Entra ID profile has them set. name (display name) is always present.

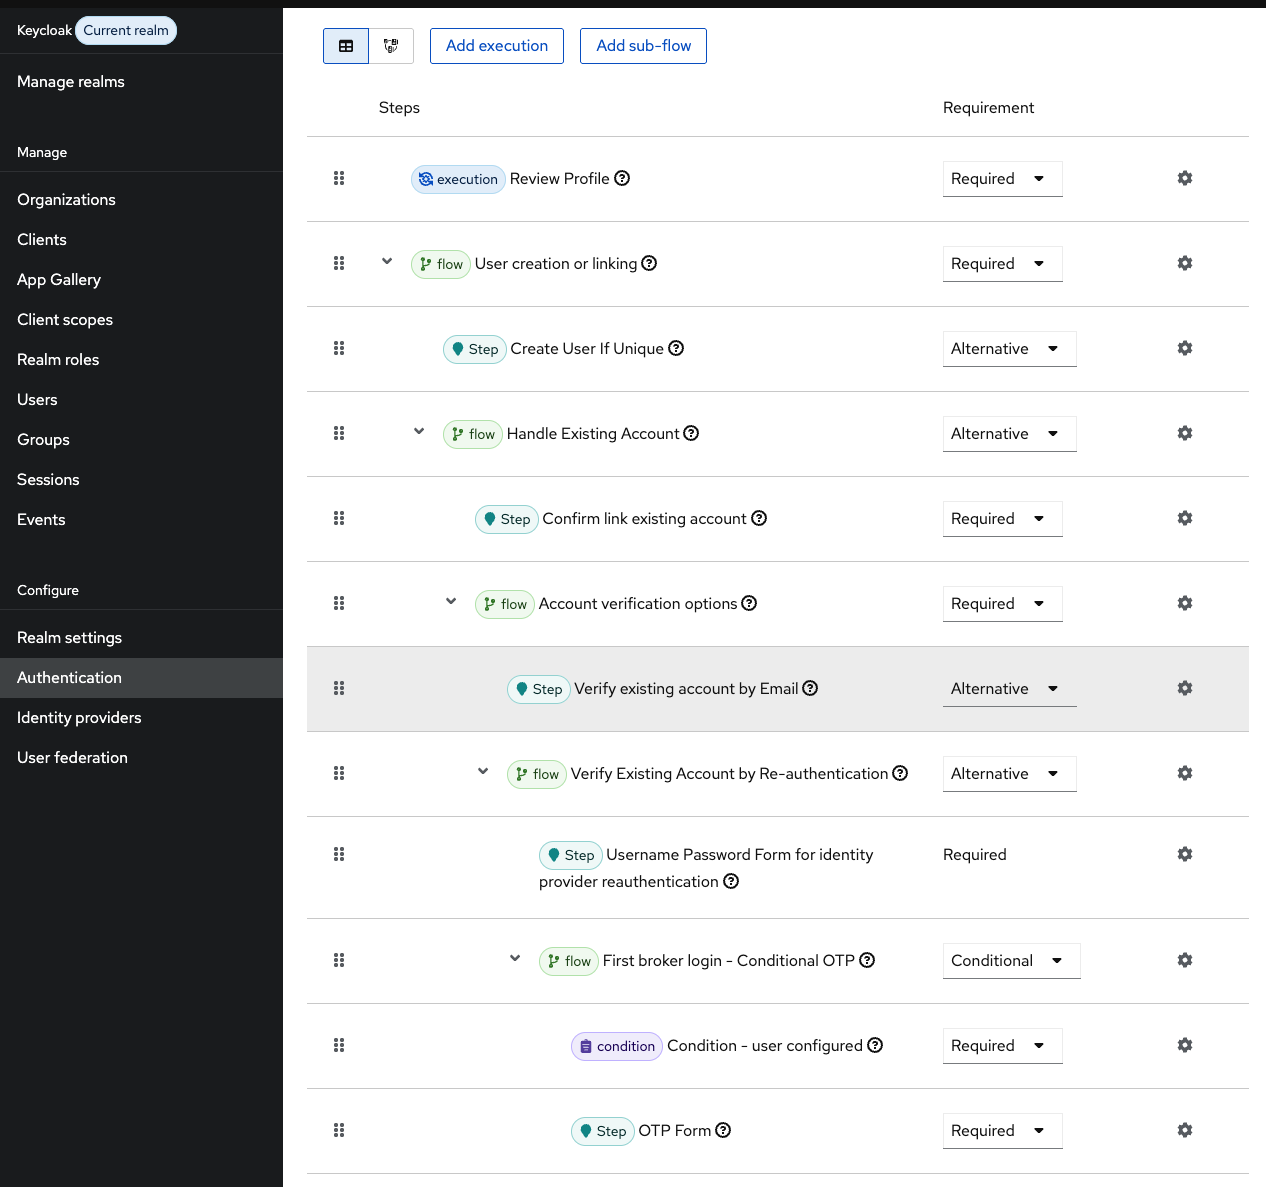
Step 5 — Configure the First Login Flow
In Identity Providers → Microsoft → Settings → First Login Flow, the default first broker login flow:
- Prompts users to review their profile on first login
- Detects existing Keycloak accounts with matching email and offers linking
- Creates a new Keycloak user if no match exists
For internal employee apps where everyone already has a Keycloak account, you may want to skip the profile review and auto-link accounts. That requires a custom first login flow — beyond the scope of this guide. For most setups, the default is correct.
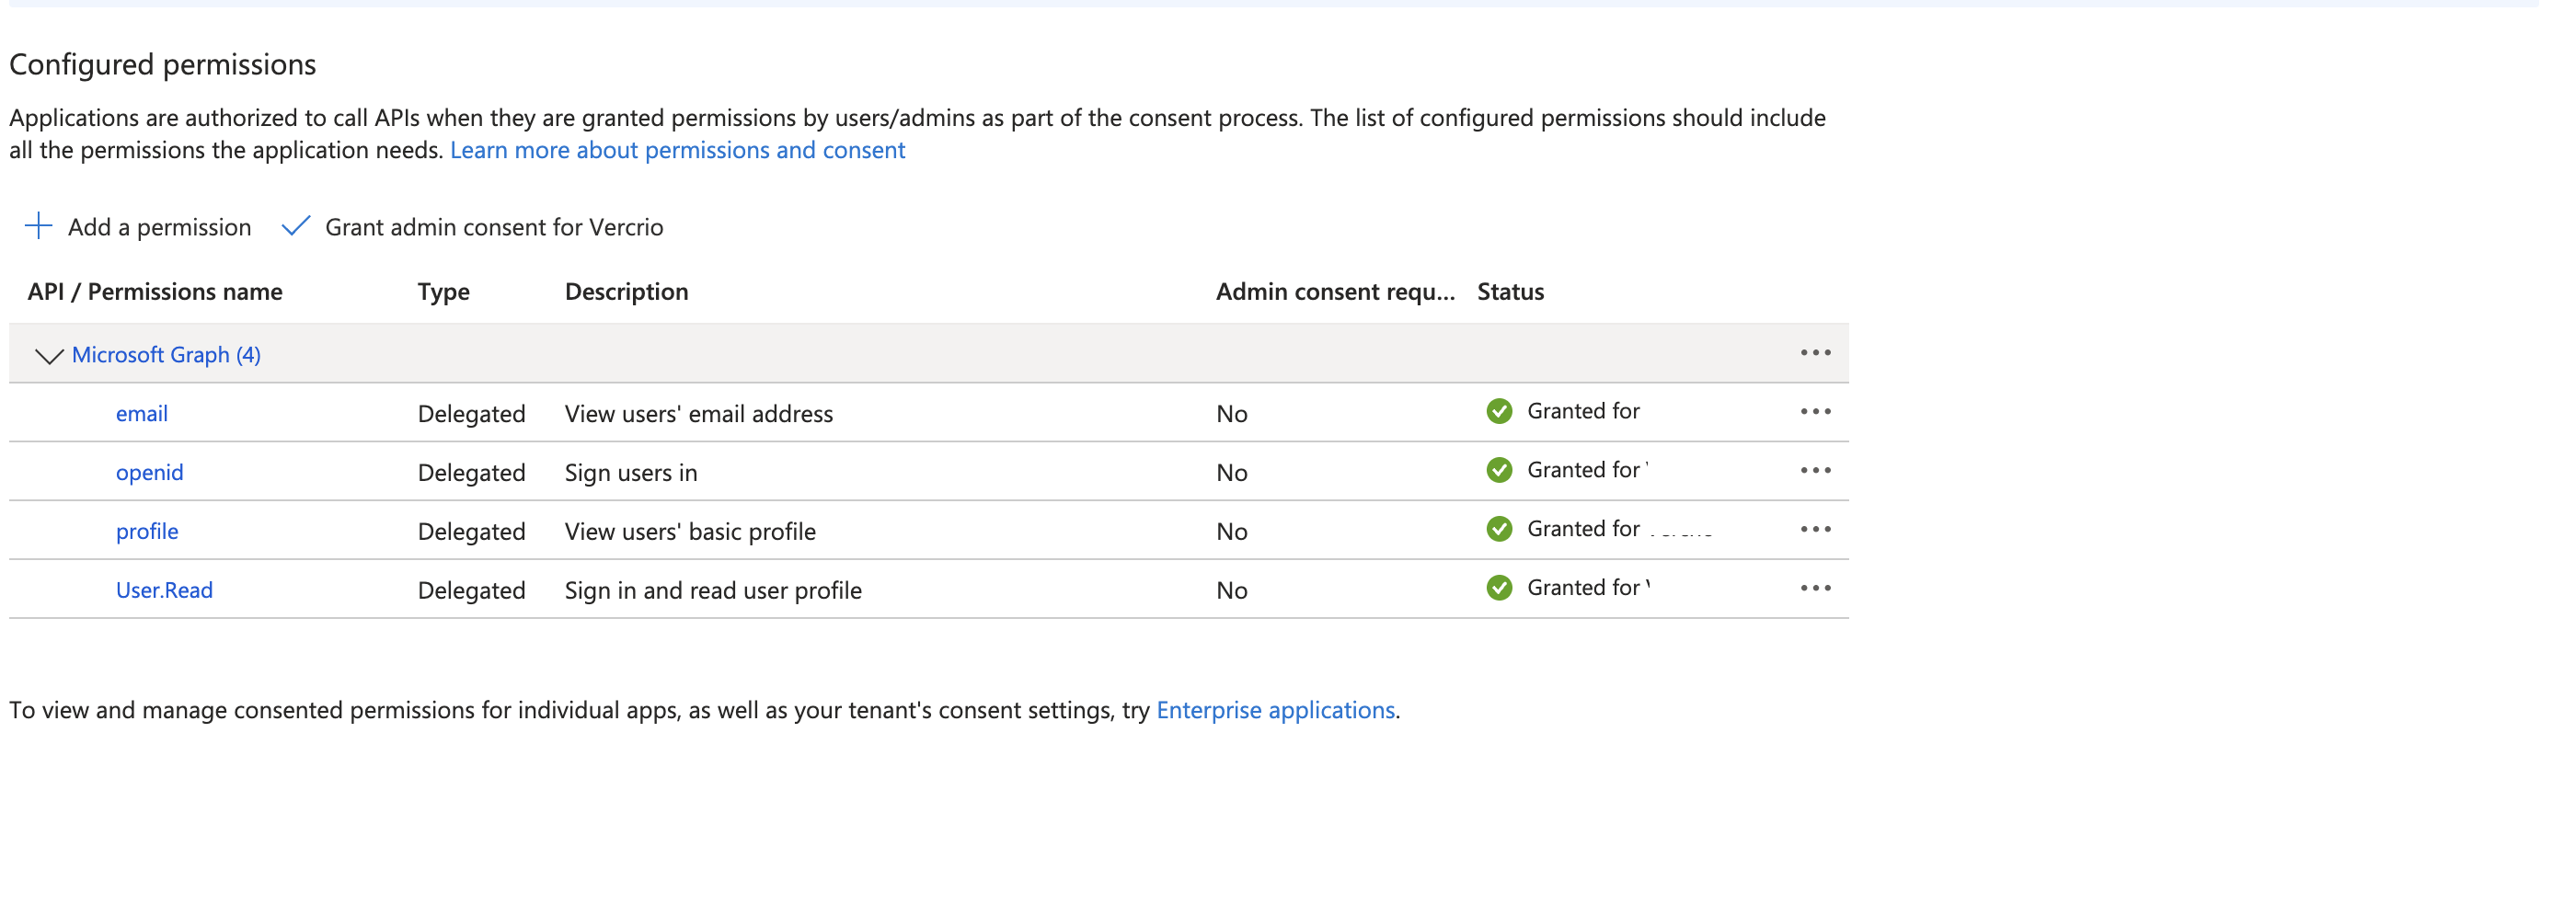
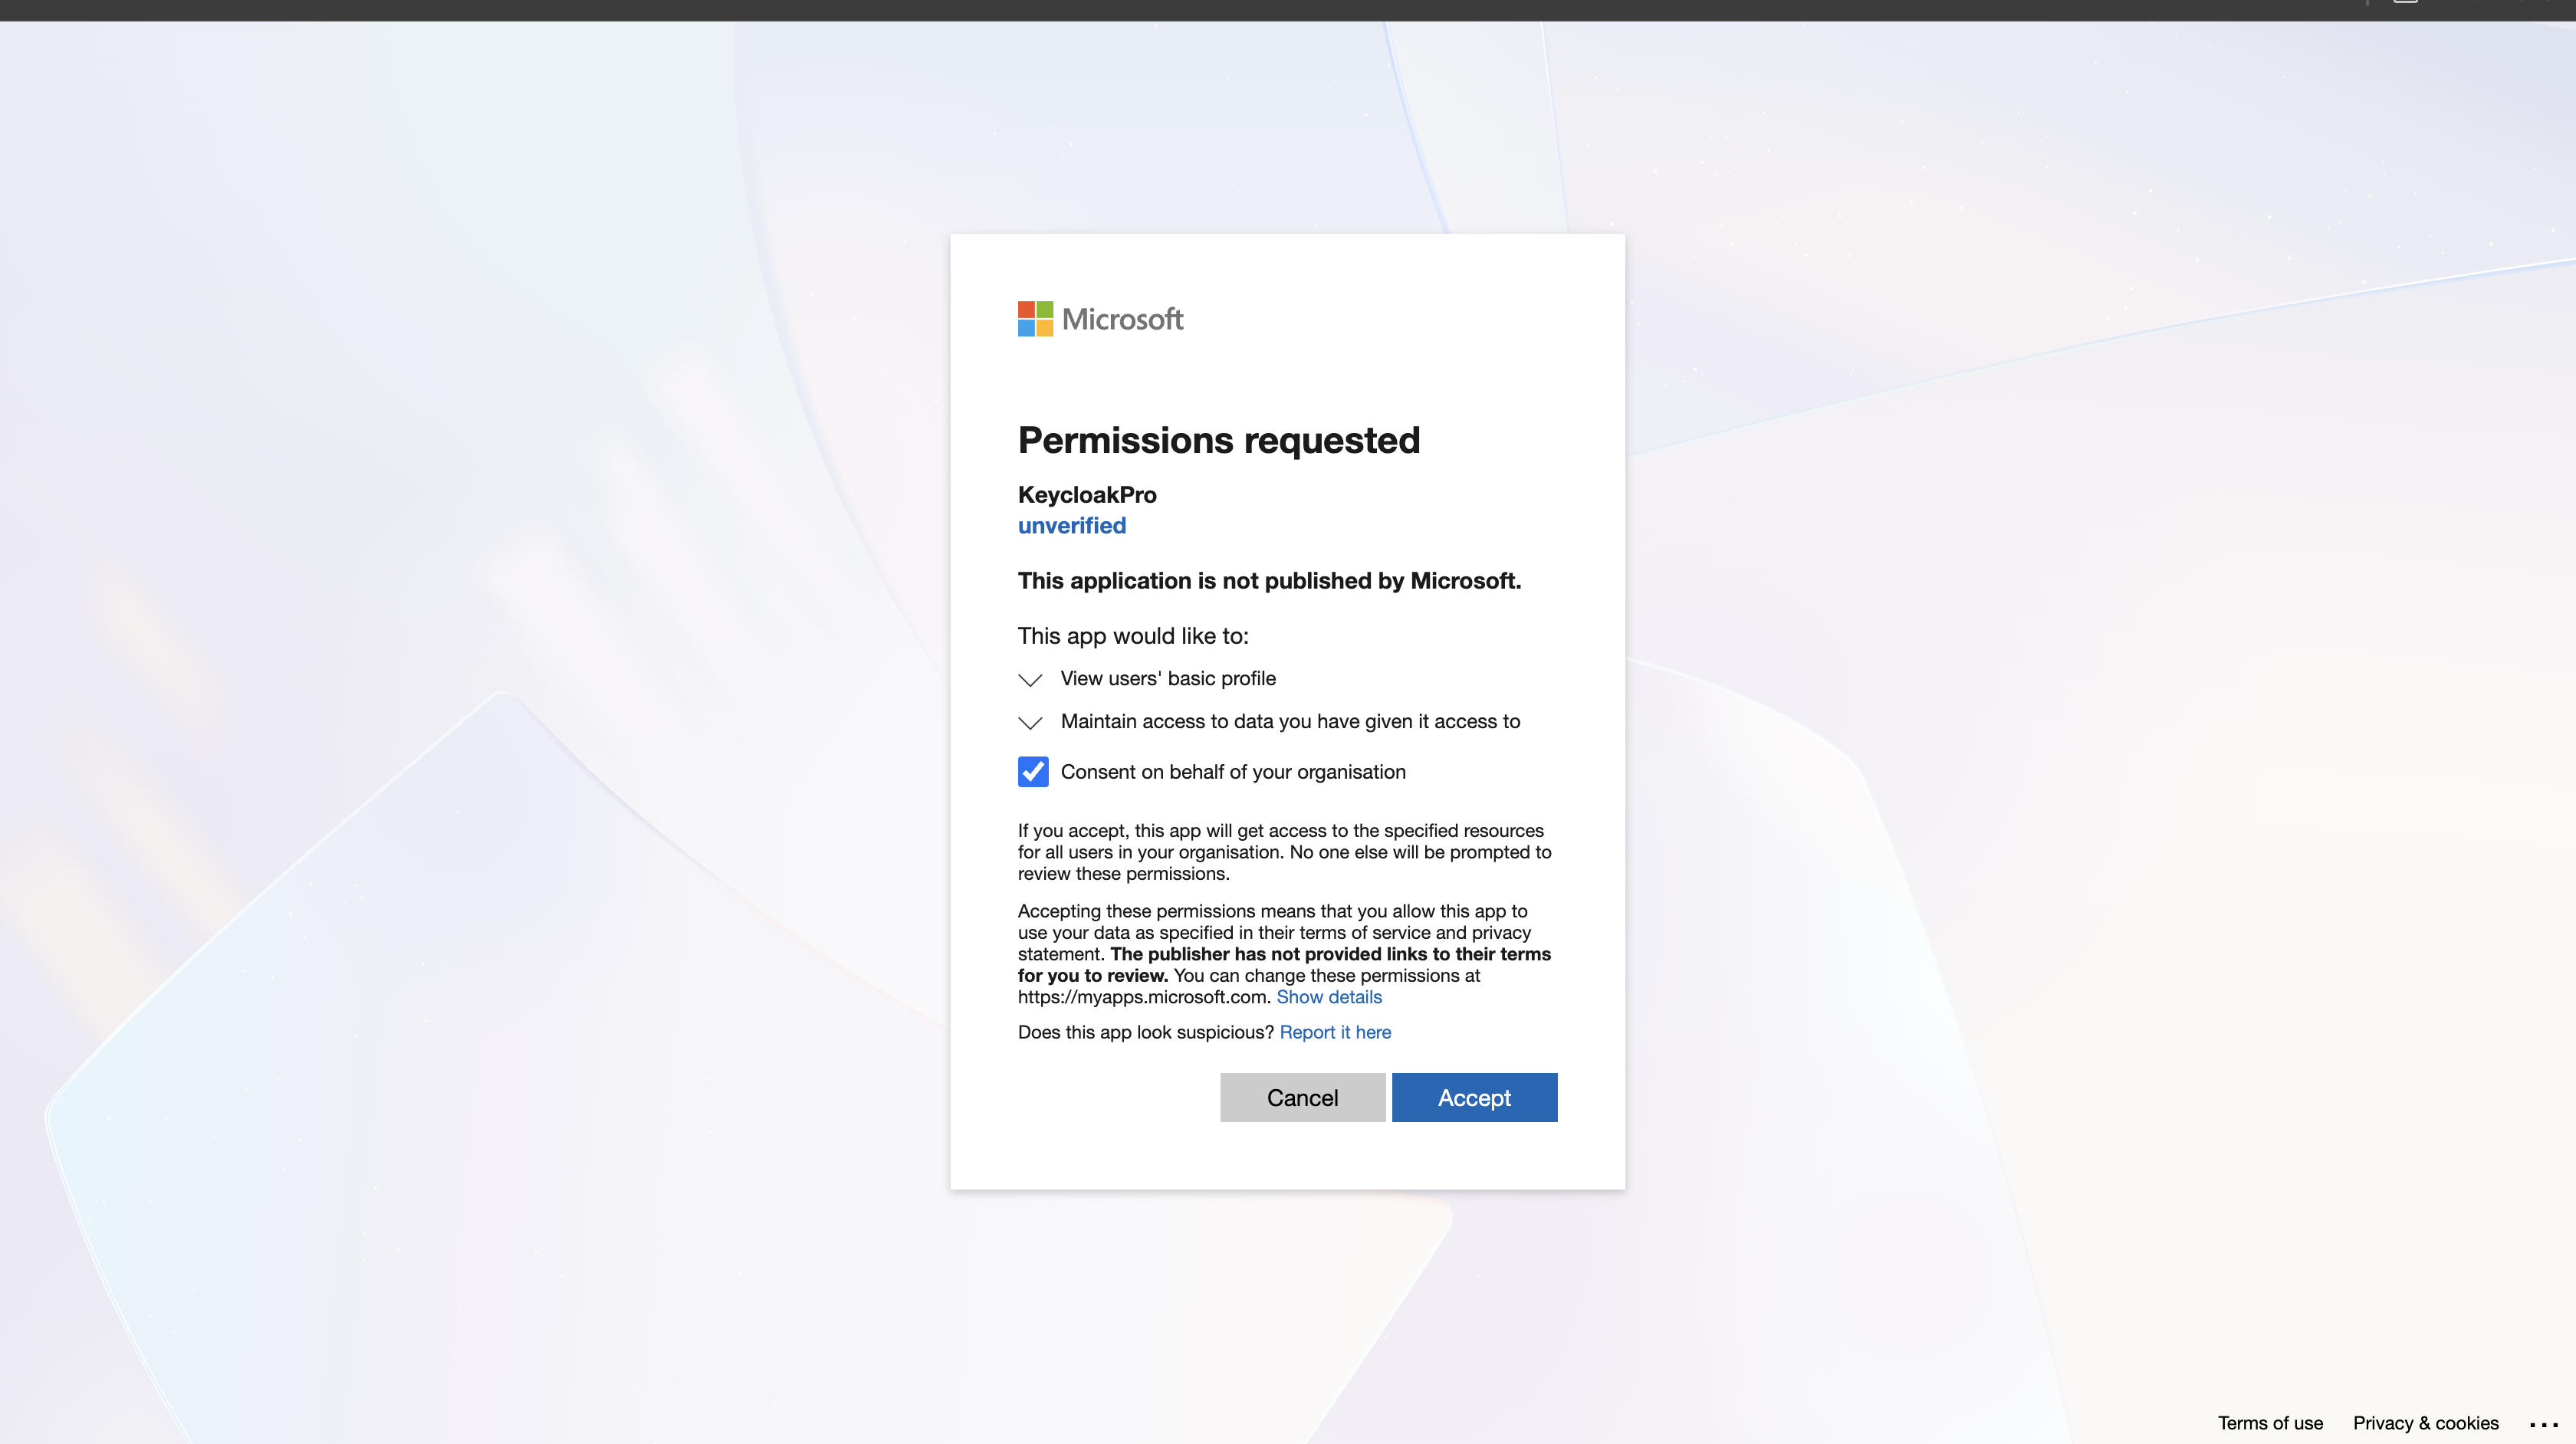
Step 6 — Grant admin consent in Entra ID
If your Entra ID tenant requires admin consent for the requested permissions, individual users cannot consent for themselves during login. Until an admin pre-consents on behalf of the tenant, authentication fails — Keycloak shows a generic "An error occurred while authenticating with identity provider" error. Grant admin consent once, before users start logging in.
- Azure Portal → App registrations → your app → API permissions
- Review the listed permissions. The default
User.Read(Microsoft Graph, delegated) covers theopenid profile emailscopes Keycloak requests. - Click Grant admin consent for
<your tenant>at the top of the permissions list. - Confirm in the dialog. The Status column should turn to a green Granted for
<your tenant>check for each permission.
The first time a user signs in, Microsoft may show a consent screen confirming the application's requested permissions before redirecting back to Keycloak.
Step 7 — Test the login
Open a private browser window and go to your Keycloak realm login page. A Microsoft button appears.
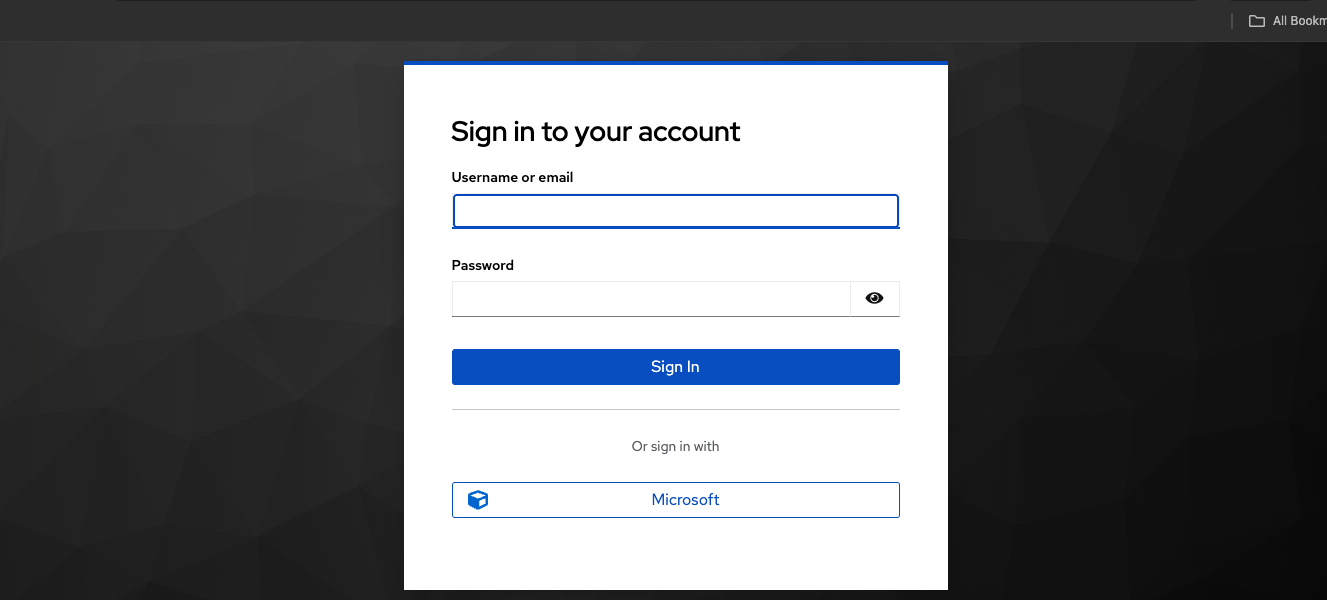
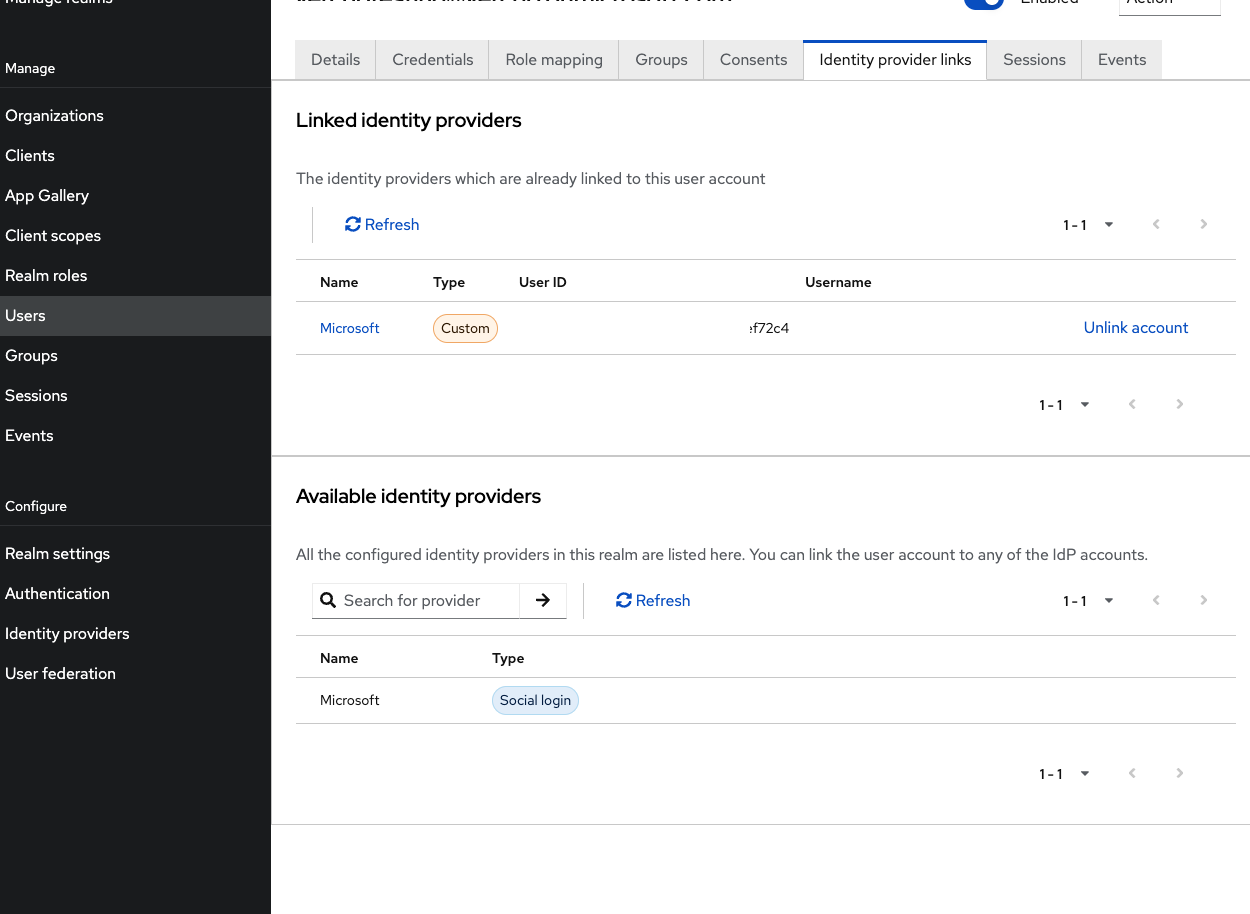
After Microsoft authentication, Keycloak creates a user and shows the review profile page. Confirm the federated account: Keycloak admin → Users → find the user → Identity Provider Links tab.
Troubleshooting common issues
"AADSTS50011: The redirect URI does not match"
The redirect URI sent to Entra ID doesn't match the one registered in Azure. The exact URI must be in the app registration's Redirect URIs list. Copy it from Keycloak: Identity Providers → Microsoft → Redirect URI field. Also check that the app registration's redirect URI uses Web platform type, not SPA or Mobile.
Users from other tenants can log in when you intended single-tenant only
The built-in Microsoft provider defaults to the common endpoint, which accepts accounts from any tenant. For a stricter single-tenant setup, switch to the generic OpenID Connect v1.0 provider as described in Step 3.1.
The email attribute is blank in Keycloak
The email claim is an optional claim in Entra ID — add it via Token configuration in the Azure Portal (Step 4). Alternatively, use preferred_username as the source for the email mapper: it's the user's UPN (e.g., [email protected]) and is always present.
"An error occurred while authenticating with identity provider"
This generic Keycloak error page (shown after returning from Microsoft) most often means admin consent was not granted for the app registration in Entra ID. When the tenant requires admin consent, users can't self-consent and the token exchange fails. Grant admin consent as described in Step 6. To confirm the root cause, check the Keycloak server log — it usually contains the underlying AADSTS65001 consent message.
"AADSTS65001: The user has not consented"
The user is seeing a consent prompt they can't complete because admin consent is required for the requested scopes. An admin must pre-consent on behalf of all users — see Step 6 for the exact steps.
Client secret expired
Entra ID client secrets have a maximum lifetime of 24 months. After expiry, token exchange fails. Rotate the secret before it expires: create a new secret in Azure, update it in Keycloak, then delete the old one.
"AADSTS700016: Application was not found in the directory"
The Client ID in Keycloak doesn't match any app in the Entra ID tenant being used for authentication. This can happen if you registered the app in one tenant but users are trying to log in from a different one. Verify the Application (client) ID in Azure Portal matches what's in Keycloak.
Production checklist
- Client secret expiry noted and rotation reminder set
- Client secret stored outside source control
- Account type (single tenant vs multi-tenant) chosen deliberately and tested
-
emailoptional claim added in Azure token configuration, orpreferred_usernameused as fallback - Attribute mappers configured for email, firstName, lastName
- Single-tenant setups using the generic OpenID Connect v1.0 provider (Step 3.1), not the
commonendpoint - Admin consent granted in Entra ID if required by tenant policy (Step 6)
- Tested with accounts from the expected tenant, and verified that accounts from other tenants are blocked if that's the requirement
Need help integrating Microsoft Entra ID with Keycloak?
We deliver production-ready Microsoft Entra ID + Keycloak integrations in 1–3 weeks.
Fixed-price, zero vendor lock-in, full source code ownership.